
My favorite thing to crochet is hats . . . baby hats, big girl hats, goofy hats, I love 'em all. And since everyone who finishes our crochet along and links up their finished cowl on Wednesday gets to pick a pattern from my shop, and since almost all of my patterns are for hats, maybe I ought to show you how it's done. Sound good?

(Good thing the crochet along is almost over . . . I'm out of crochet comics!)
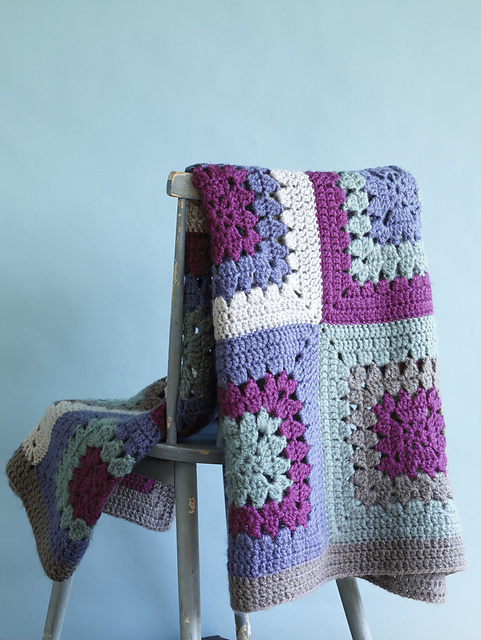
In our lessons so far, we've learned how to crochet in straight rows, which is exactly what you need to know for tons of great projects and patterns. But what if you want to make a granny square blanket?
Or a cute hat to wear with your new cowl?

Or even adorable little slippers? (these are on my to-do list . . . aren't they sweet?)

These projects all start with a circle.
Crocheting in the Round
There are a few different ways to crochet in the round--I'm going to show you three variations here. When you're following a pattern, it'll probably tell you which way to use, but you can substitute a different method if you have a favorite. I'll start with what I would consider the most common way to begin working in a circle.
You'll start by making a chain (again, your pattern will tell you what to do and how long your chain needs to be--I chained 4 for my example piece here):

You'll then work a slip stitch into the first chain (the one farthest from the hook)--I never covered the slip stitch in our crochet lessons here since it never came up in the Time Out Cowl pattern, but it's really simple--you just insert your hook through the stitch, yarn over, and pull the loop through all the loops on your hook. No more yarning over like you do with every other stitch. Just grab a loop and pull it right through--here's a link if you'd like a visual.

(here we are, mid-slip stitch)
Once you've made a slip stitch in the first chain, you'll have turned your chain into a little circle. It may take a little pulling/imagination to find it since it's so dang tiny, but you now have a ring.

Now, you'll make a chain (just like your turning chains when you're working in regular, straight rows), but instead of working into any particular stitches for this first row, you'll just work into the middle of the circle you just created. So when you're inserting your hook to make your stitches . . .

You'll insert it there, right into the center of the circle. So as you keep working, you'll see a circle of stitches forming.

And once you've made whatever number of stitches the pattern calls for, you'll just work another slip stitch into your "turning chain" that you made at the start of this row to join it into a circle.


Look at that nice circle! It makes me feel happy inside.
One quick note about working in the round--you'll almost never turn your work as you normally do. You'll just keep working in the same direction that you started in (counter-clockwise). So when you get to the end of a row, you'll slip stitch to join the first and last stitches, make a chain to be "tall" enough to work the next row, but keep going in the same direction.
If you'd like some more help, here's a link that explains crocheting in the round.
The Magic Circle
Doesn't that sound cool? (Sadly, it's not quite as fantastical as the name makes it out to be.) The magic circle, or adjustable ring, is another way to start working in the round. It's my personal favorite, and although it does take a bit of practice to understand, it's so handy because you can actually adjust it so that you have as large, or small, or practically non-existent opening as you please. Don't get frustrated if it doesn't make sense at first--it took me dozens and dozens of attempts to figure it out. And I don't think my pictures are going to be that helpful, so right off the bat, here's a video for you, and here's a post with some really great pictures that are far superior to what I have, so you might just want to head over there and skip my poor pictures and explanation.
Begin by starting to make a slip knot on your hook, but leave it plenty loose--don't tighten it up around your hook.

Do you see where the yarn criss-crosses over itself at the top of the circle in the picture above? Pinch that criss-cross tight to keep your circle from coming undone while you work. I also find it helpful to use a few fingers to hold the circle open. Tighten the yarn up a bit around your hook.

Now chain 2 while still holding the circle in place.

(It would be wise to use two hands to crochet in the round. I was taking these pictures all by my lonesome so it got a bit funky trying to do everything with one hand.)
Just like in the other circle method that started with the chain, you'll work your stitches into the circle--so just insert your hook right into the middle of the circle as you make your stitches.

When you've made all the stitches you need, pull on the yarn tail to tighten up the circle (like magic!).

Then slip stitch to the starting chain to join the first and last stitches into a ring.

Tada! It may take you a few tries to get the hang of it, but you'll love it and you'll never go back to starting circles any other way.
Making a Hat
For the last way to start crocheting in the round, I figured I'd do a real quick hat-making demo--we'll start the circle in a different way than shown above, and you'll also see how most hat patterns progress. No matter the hat pattern, they almost always start in the same basic way:
- make your circle and first row of stitches
- start increasing by putting two stitches into each stitch from the previous row
- alternate one stitch with one increase
- repeat the previous row, adding additional "regular" stitches between each increase, to reach desired size
- work one stitch in each stitch from the previous row till you get the length you need
I found this preemie hat pattern from The Dainty Daisy that I'm making in these pictures (you can make and donate these hats to be used in the NICU . . . you can find all the info in this post, and it would be a great way to practice working in the round while helping sweet little babies!)
The pattern says to start with a chain of 2.

Then work 10 single crochets into the first chain (the one farthest from your hook). So it's just like increasing--all those stitches are going into the same chain. Then slip stitch to the first single crochet to join the circle.

(That picture is a perfect example of why I love the magic circle method so much--you can tighten it up so there's no opening at the top of the hat!)
Now chain two, and (without turning your work!) work two double crochets into each of the single crochets from the previous row. (Once again, increasing.) Then close it up with a slip stitch at the top of the chain two (marked with the needle).

Since this pattern is for a teeny tiny little preemie hat, not much increasing is needed to be large enough for their itty bitty heads--you'll just increase for one more row before continuing on with just one double crochet per stitch. So chain two and work one double crochet in the first stitch, then two in the next, and repeat around.

It's growing! Now just keep on going, only working one double crochet in each stitch, and soon you'll have a teeny little hat.

There you have it! If you'd like to practice, I'd suggest using that preemie hat pattern, or a basic beanie like this one just to get the hang of crocheting in the round.
Make sure your cowls are finished up, photographed, and ready to link up and show off by Wednesday! I'll write a quick post early next week explaining how to link your cowl up, if you don't know what I'm talking about. Happy hooking!

I love me some hats, too! Great tutorial, as usual!
ReplyDelete~ Sarah
You seriously amaze me!!!
ReplyDeletelOVE the comic...I think you saved the best for last.
ReplyDeleteliZ
Your tutorial is amazing. Such great pictures and instructions. I love to crochet. My cowl is completed and now I need to take some pictures and post it.
ReplyDeleteRuth
I love making hats too, especially for babies. I need to make a bunch and donate them to the local hospital... did that last year and it was so much fun and all the new Moms loved them! Thank you for sharing how to do the magic circle, I have been wanting to learn how to do that!
ReplyDeleteThank you so much for your instructions and the links. Very helpful. I've now started making my first hat (an earflap pattern from stitchtacsew.com)...it's going well but my makeshift "Stitch marker" (just an earring) slipped out of my work...is there a way to figure out where I am? *nervous laugh* I know I have ABOUT 8 rows, the problem is now I don't know where they start and stop! I am in the part of the pattern where I just sc in each stitch for 12 rows. How important is it that I know where I am for this? I guess now I know I need to actually buy a stitch marker. :)
ReplyDeleteKendra--girl, I've so been there! I actually don't have stitch markers, either . . . I just drape a scrap piece of yarn through and yep, sometimes it gets lost along the way. As for finding how many rows you've done, you could look back through and find the last increase by looking for two stitches in one space, and count from there, or you should be able to get a row count by just counting down rows from the very top. You may not get the exact start/stop point for rows 100% perfectly, but it isn't a huge deal--as long as you know roughly where you are, you should be fine. And good for you for moving on to hats!
ReplyDeleteI have never been able to figure out how to crochet in a circle like that. Since I found your post on pinterest I've started making little preemie hats to donate to NICU's at inner city hospitals <3
ReplyDeleteI am making a hat in the round that calls for me to turn my work after each round. I'm finding that difficult. Will I get the same result if I don't change directions each round, but still follow the basic directions?
ReplyDeleteI am working on a crocheted hat that calls for me to turn my work after each round. I find this to be rather confusing and want to know if there is a reason to turn or if I can do rounds without turning and get the same result.
ReplyDeleteThanks!
It depends on the hat . . . some patterns will tell you to turn when you can easily skip that and just keep going in the same direction, but for some patterns to take shape you do have to turn it. You could just try skipping the turn and see how it works out! If you want to send me a link to the pattern if it's online, I could let you know what I think!
DeleteThanks! I will mark where I am on the pattern so that if I need to go back I can do so easily. Unfortunately it is not online, but is from a Crochet magazine. I made this same hat once before --- don't remember having this much trouble. Of course I'm using different yarn, but in the same category, so that could be making a difference. Just found your blog --- so glad to have done so!!!
ReplyDelete