
Today's little lesson is the last thing you need to know to be able to complete your Time Out Cowl--how to finish 'er off, sew it up, and get rid of those yarn tails! For anyone just jumping in, or if you need a recap, here's a quick link list of our crochet along posts so far . . .
Wow, we have covered a lot of information--if you've been following along, practicing, and working on your cowl, you should really feel proud of yourself. Crochet isn't the easiest craft, and you've learned so much about it already! I'm so proud (eyes brimming with tears).
So where are we? Ah, right. You're coming right along on your cowl and it's time to finish it up. But so far, it's looking like a big rectangle, not a cowl. We need to stop crocheting and start finishing (that sounds counterintuitive).
Fastening off
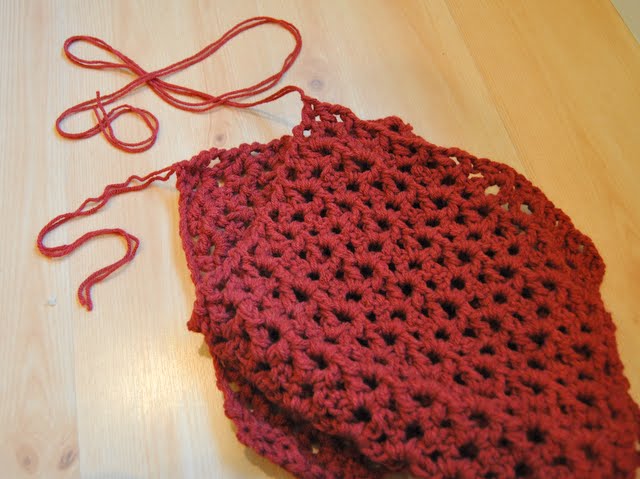
Like many of you, I decided that the full 52 inches, as recommended in the pattern, was going to be a bit much, so I stopped at the end of a row at about 33 inches, and here's what I had: (bear in mind that instead of chunky/bulky yarn, I decided to use two strands of worsted weight to make my cowl, so my pictures will have two strands of yarn where you'll probably have one)

Fastening off your work is simply ending your project and securing your yarn tail so your work won't unravel all over the place. If we zoom in on my last few stitches . . .

. . . you can see that I stopped right at the end of a row--after the last double crochet, but before the chain 3 that leads up to the next row. To fasten off my work, I simply yarn over as if I'm going to make a chain:

Pull that loop through the one already on my hook:

And let that hang out for a minute while I cut my working yarn. I need to leave myself a pretty long yarn tail so that I can use that tail to sew the short ends of my cowl together--about 12-18 inches should do it. So I snip the yarn about 18 inches from my cowl:

Then just pull the yarn tail through snugly:

That creates a tight little knot that will prevent my cowl from unraveling! Now when I look at my cowl, this is what I've got . . . one end has a big long yarn tail hanging out (the ending yarn tail) and one end has a shorter tail hanging out (the starting yarn tail).
I'm going to pick the shorter of the two tails and weave it in.
Weaving In
Weaving in is simply sewing the yarn tails through some of the crochet work to hide it and further secure it to prevent it from coming undone. I start weaving in by threading the shorter yarn tail onto a blunt, large-eye needle.

Now I take the needle and start working it through some of the loops in my crochet:

This is not a science. You just work your needle in and out, back and forth, in a sort of zig-zaggy pattern through the loops of your cowl. You're not going through to the opposite side of the cowl, just working into some of the loops of the stitches. Don't get too worried about this--it really is not a big deal. You're just hiding that yarn tail.

I just keep working up and down, in and out, stitching in that yarn tail, until I've sewn a few inches of it into the cowl. Now I remove the needle and pull the yarn snugly, so it's stretching through the cowl a little bit:

And cut the tail off close to the work (make sure you don't snip any of the actual cowl when you cut the tail! I've done this before! THE HORROR!):

By pulling the yarn tail snugly before cutting the end off, the little snipped end will pop inside the work and hide there forever. So now I have one nice, clean, tailless end of my cowl! (If you used more than one ball of yarn for your cowl and have tails hanging out where you joined in the new ball, go back through your work and weave these ends in as well, making sure to remove any knots you may have tied before weaving the ends in!)

If you don't want a cowl, but would rather have a scarf, do the exact same to the other end of your cowl and you'll have a big cuddly scarf. But if you want a loop, we'll use the other yarn tail--the big, long, 18-inch-ish one--to sew the short ends of the cowl together!
Sew Ends Together
Some of you asked about how to create a twist in the cowl, an option I showed you in this post. It's easy as pie--you simply take one end of your rectangle and flip it over once, creating a twist or fold in the middle, then follow the rest of these instructions.

If you don't want a twist (I didn't, so the rest of these instructions won't picture the twist), just lay your rectangle out flat and bring the short ends together.

Thread your large-eye needle on to the yarn tail as you did earlier on the other end of the scarf, and simply start stitching the two short ends of the cowl together.

There are quite a few different techniques you can use to join crochet work together--you can single crochet ends together, slip stitch them together, whip stitch them together, etc. etc. If you're making an afghan, for instance, and joining tons of granny squares together to make a blanket, I would definitely recommend trying some different methods out and seeing which end results you like the best--some create more visible seams than others.
But here's the thing . . . we're making a cowl. Not a blanket. And it's already huge and chunky, and personally, I'm not too concerned about a perfect, invisible joining seam on my gigantic fatty cowl. So I just stitched it up, not really following any particular method. Just sewed up the seam. Back and forth. (Don't pull the yarn too tightly as you sew--you don't want a puckery seam.)

Boom. Sewn.

Now just tie a little knot at the top to secure your yarn:

And weave a few inches of your yarn tail in, just as you did earlier:

Snip off the remaining yarn tail, and you have a lovely, snuggly, thick and chunky winter cowl to keep your neck cozy warm this winter!

(How do you like my in-the-bathroom-mirror self-portrait? I'm definitely going to need to enlist my husband to help me take better pictures of my cowl later.)
If you have any questions, leave them in the comments below or email me at maybematildaquilts(at)gmail.com and I'll do my best to answer them! And feel free to share any pictures of your cowl progress or finished beauty in the Maybe Matilda flickr group--I love seeing how your cowls are turning out!
Keep working on your cowls, and I'll see you here Friday for another little lesson on working in the round (we didn't need to know this for the Time Out Cowl, but you'll need to know it if you want to make hats or other round projects!). And make sure you have your cowl finished and photographed by next Wednesday, Oct. 5th, and ready to link up and share!

I need to take pictures of my finished cowl :) I slip stitched mine together - in all honesty it was just easier at the time, I mean the needle was in my bag across the room haha!
ReplyDeleteLooks great! Can't wait to get mine finished up and post some pictures as well!
ReplyDeleteBeautiful! I love how your cowl is a bit shorter than the pattern calls for. I thought you were using turquoise yarn though! Oh well, I'm obviously blonde. Red is beautiful, too. Great job... it looks fab with the double strands. I can't wait to post my finished product!
ReplyDeleteIf you haven't already, you should think about putting all of the information together into a PDF or ebook for sale. You've put a lot of work into it!
ReplyDeleteLove your crocheting! I came over from "Made it on Monday." Happy to be follower # 1000 via GFC. :D
ReplyDeletehttp://nestofkrohs.blogspot.com
Oh I need to learn to do this! Thanks for the instructions!
ReplyDeleteI'm obsessed with crochet right now and your blog is fabulous!!!
ReplyDeleteNew follower!!
scrapproject365.blogspot.com
Ok, I just pinned about 5 projects on your blog. So cute!!! I really need to re-learn how to crochet!
ReplyDeletehi rachel,
ReplyDeletethanks so much for this crochet along! you are a fantastic teacher and i'm proud to say this first time crocheter made 2 cowls!
i'm almost finished but quick question: is the only knot that remains on the cowl after the weaving in and sewing up process the last one from sewing the 2 ends together? thank you thank you thank you. (and i'm super excited about starting on some hats)
kudos to you for doing this.
Yay, Lynn! Two cowls?! Great work! I'm so glad you got the hang of it and are having fun :-)
ReplyDeleteYou're exactly right--the only knot should be the one that you make after sewing the ends together. Any knots that you may have made along the way while adding a new ball of yarn should be untied before you weave those yarn tails in. It's kind of a nitpicky crochet rule (and, honestly, probably doesn't matter much), but that's supposedly "the right way" to do it :-) I'm excited to see your finished cowl(s)!
okay, forgive this question in advance: is there a front and a back?
ReplyDeleteLynn--that's a really good question . . . on this pattern, no, there isn't. Patterns that are worked in the round (like hats, granny squares, etc.) DO have a front and back, but a pattern like this that's just back and forth, where every row is basically the same, doesn't have a front or back.
ReplyDelete