
Well, I woke up excited this morning (it seems like an unusually high number of my posts here start with me waking up feeling good) because I'm a guest blogger today over at Craftaholics Anonymous! I'm sharing a tutorial for a knotted headband and it is super cute, if I may say so myself, and very simple to do.

My husband, when he saw it, asked me why I didn't do something more complicated and impressive, but my goal was for you to see it and be able to accomplish it, even if it's your first time crocheting--this project is just about as easy as it gets! So don't be scared . . . get your paws on a crochet hook, use some scrap yarn (you won't use much!), and get to work!

My husband, when he saw it, asked me why I didn't do something more complicated and impressive, but my goal was for you to see it and be able to accomplish it, even if it's your first time crocheting--this project is just about as easy as it gets! So don't be scared . . . get your paws on a crochet hook, use some scrap yarn (you won't use much!), and get to work!

You can hop on over to Craftaholics Anonymous (click on the button above!) to see the tutorial, or just click "read more" for the full tutorial below!
Knotted Crochet Headband
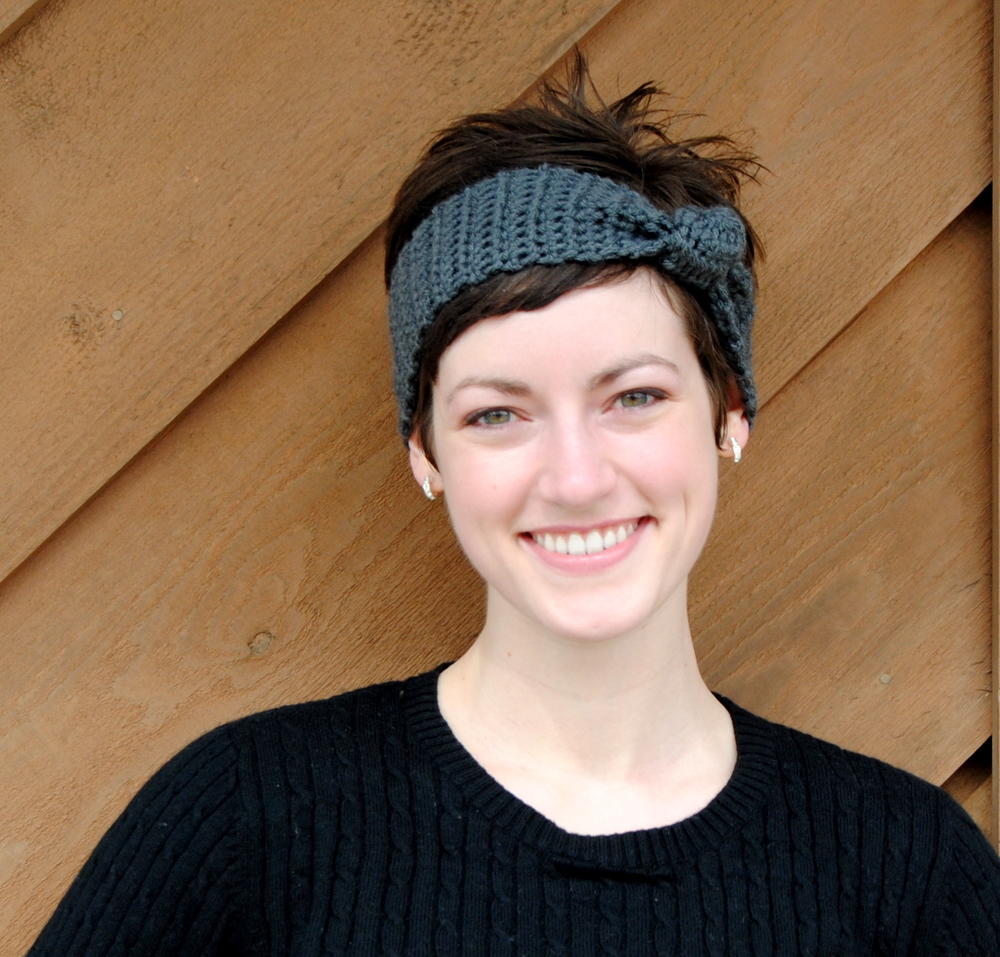
(I sure hope you appreciate this picture because as we were taking it, someone was honking on the street as they drove by. It was terribly awkward, so I only ended up with 3 shots to choose from. Not my favorite picture on the planet, but I was way too embarrassed to go back out for more!)
Here's what you'll need to make this headband:

- yarn (you won't need much--you could get away with using leftovers from another project)
- crochet hook (size isn't terribly important, especially since you'll be sizing the headband yourself--I used a G hook for the baby size, and an H hook for the adult size, but use whatever you have . . . no need to go shopping for a specific size hook)
- tapestry needle
- ruler (optional! I'd actually recommend using a real live head for sizing instead of a ruler)
All right, here we go! You'll be working up the width of the headband . . . meaning every row will add to the length, and you'll be working back and forth across the width, so start by making a chain that is one stitch greater than what you'd like your headband's width to be (to learn how to make a chain, click here) (make sure to leave a decently long yarn tail, because you'll need it later to sew your headband into a loop--6 inches or so should do it):

I'm making the little green baby headband in these pictures, and I wanted it to be rather thin, so I made a chain of 6--the last chain will not contribute to the width, and I wanted it to be about 5 stitches wide. For the adult size, I made a chain of 11, so the headband ended up being 10 stitches wide.
Work a single crochet into the second chain from the hook and in each stitch across (so if you started with a chain of 6 as pictured, you'll have 5 stitches at the end of this step) (to learn how to do a single crochet, click here).

Here's what you should have at the end of this step:

Chain 1, turn your work, and single crochet in each stitch across (you should still have the same number of stitches as you did in the previous step--5, if you started with a chain of 6, or your starting chain length minus 1).
This is where your own sizing comes in. You will simply repeat that last step until your headband is as long as you want it to be--you could measure your head (or the head of whoever will be wearing your headband) and use your ruler to check your progress, or just wrap it around your head every once in a while to see when you're getting close. I wanted a headband that would fit a 15-inch head, so I worked until my headband was 15 inches long when laid flat:

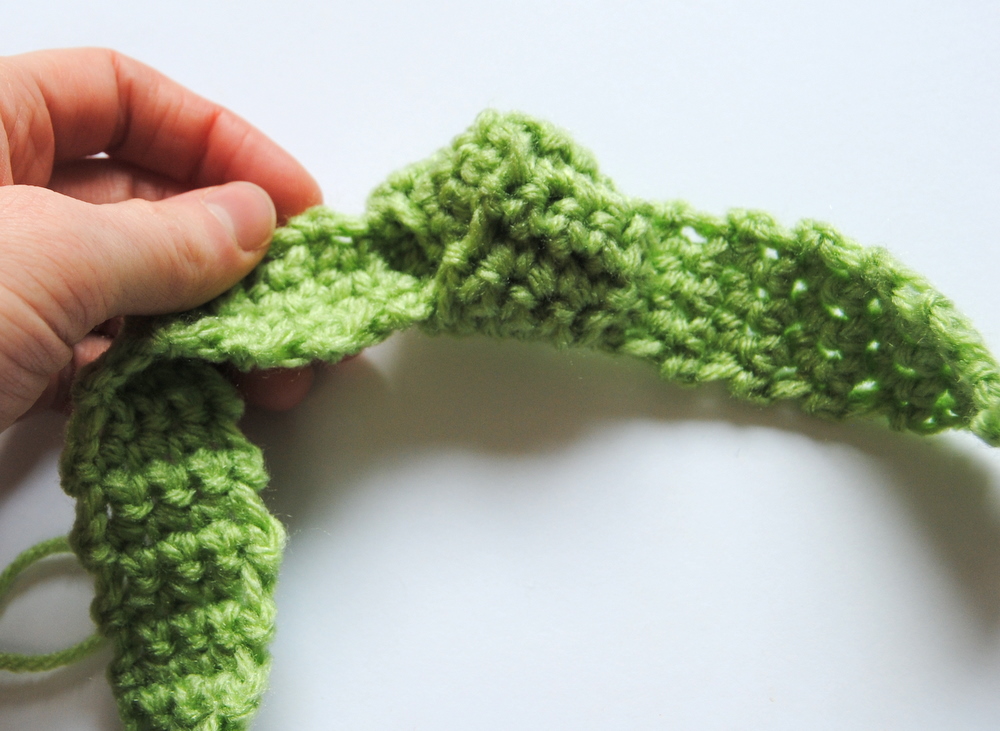
If you aren't using a ruler, just keep going until the headband fits around your head without too much stretching. You'll have a big long rectangle, like so:

Now, take the end you started with and tie a knot in the first 1/3rd of the rectangle:
Adjust it until you think it's cutesy-pootsy and try it on again--tying the knot will use up a few inches of headband length, which is exactly what you want. The headband will have a good amount of stretch to it, and you want to have to stretch it at least an inch or two to make the ends meet around your head. Remember, you want it snug! If necessary, crochet a few more rows or pull out a few rows to achieve the fit you feel comfortable with. When you've got the length you want, snip your yarn and fasten off the end (click here to learn how to fasten off your work).
Use your tapestry needle to weave in the yarn tail at just the end of your work (not the tail at the start of the headband!) . . . this step isn't anything fancy, you just want to secure the yarn tail in your work and hide it, so just sew it through some loops for an inch or two and cut the tail off close to the headband:

Now use your starting yarn tail to sew the two short ends of your headband together--just sew your ending stitches to your starting stitches, and weave in the tail just like you did on the other end of the headband:

If necessary, adjust the knot to a position that you're happy with, and you're done!


All right, get to work, and send me a picture when you're finished--I'd love to see your version!

What a super cute project (and baby!). :)
ReplyDeleteWhat a cute blog and an even cuter etsy shop! I love this tutorial as well :) Following you as well now!
ReplyDeleteSo cute! And it does look easy to make...even for a newbie like me!
ReplyDeleteCute model too :)
Hi rachel, I do love crocheting too, you can imagine how much, when my babygirl born (she is now 4) I made her more than 20 pairs of shoes, and headbands, wow, a lot. Is like my addiction! :) tks for sharing such and amazing tutorial. Hope you can visit me in my blog at www.burundanguitas.blogspot.com
ReplyDeletexoxo, dalys
@BURUNDANGUITAS CS
ReplyDeleteDang, Dalys, 20 pairs of shoes for a newborn?! That girl is more well-dressed than I am! Thanks for the compliment on my tutorial--I'll definitely be checking out your blog!
Hi, me again, here is the link of the post introducing you. hope you have a chance to visit me.xoxo, dalys
ReplyDeletehttp://burundanguitas.blogspot.com/2011/03/what-i-have-found-lo-que-encontre.html
NICE JOB on the tut!!! Looks great! I am definitely going to try one :)
ReplyDeleteCute models ;)
I've never been more excited about a tutorial.
ReplyDeleteI have never actually crocheted anything, but I am going to attempt this.
You rock.
that is adorable!!!
ReplyDeleteGreat project!
ReplyDeleteLOVE this I totally want to make one, I love crocheting! Thanks for the great tute!
ReplyDeleteMeet Virginia Design
So cute. Thanks for the link! I whipped one up and linked to you. :)
ReplyDeletehttp://stubbornlycrafty.blogspot.com/2011/03/knots-lentils.html
Thanks for the tutorial!
I love it! so cute!!!
ReplyDeleteLove this project, am going to make it as a thank you for my friend. So easy!
ReplyDeleteAnd PS: Your picture looks good, honk and all!
This comment has been removed by the author.
ReplyDeleteHere is my headband...thanks for the tutorial and I agree - GREAT picture!!
ReplyDeletehttp:/littlebittythings.blog/2011/03/31/crocheted-headband.html
Thank you so much for the adorable tutorial. I am working on this right now in a dark blue/gray color. I am linking to you on my blog. Thanks again!!!
ReplyDeleteIt's finished, it's finished! Thanks so much.
ReplyDeleteThis is so adorable! I wanted to let you know I included one of your photos in my "how to crochet" article on Tip Junkie: http://www.tipjunkie.com/how-to-crochet-basic/
ReplyDeleteHi Rachel,
ReplyDeleteThank you so much for this tutorial, it was a lovely simple project that I could start and finish in one go.
I've blogged about it over at:
http://countryrose7.blogspot.com/2011/07/cute-baby-accessories.html
Hope you can pop over to check it out,
Ashley xxx
Does a 15 inch headband fit most babies' heads? I am hoping to make a few of these for Christmas/baby shower gifts, but I don't have a baby head to measure. Thanks!
ReplyDeleteShortcake--the 15" headband fit my 7-month old pretty snugly, so maybe it would be best as a 3-6 month size (but his head was kind of big). I often use this size chart to help figure out hat and headband sizes for babies and children: http://www.bevscountrycottage.com/size-chart.html
ReplyDeleteHope that helps!
I made it today! Thick yarn makes the knot look really good. I think I should try brighter colors and have a collection of myself. Thank you for this lovely pattern.
ReplyDeletep/s: Oh and you look gorgeous in that hairstyle too =)
just want you to know that our family LOVES this!! I have made one for just about every female in the family and varied width and colors and all were loved!! THANKX
ReplyDeleteI just made this a few days ago (found it on Ravelry), wore it at work and now people are asking me to make headbands for them! I love the simple design. I'll be sharing the link on my blog. Thank you for posting this!
ReplyDeleteI made this today http://makesomethingdaily.blogspot.com/2012/01/crocheted-knot-headband.html
ReplyDelete- thanks for the super straightforward tutorial. I found you through Pinterest - can't wait take a closer look at your site!
I have short hair just like yours...and am itching to make this! I just hope it looks as good on me as it does on you; you are just adorable!! Thanks for sharing the pattern.
ReplyDeleteGreat job!! I sadly cannot crochet. Do you think I could get the same look on a loom (regular gauge, Knifty Knitter looms)? Thank you!! And your profile picture is so pretty! :)
ReplyDeleteCute pattern, but the finished adult band doesn't look like a single crochet stitch to me. Is that just because it is stretched so much? That will help me plan the width & length if there's that much stretch in it.
ReplyDeleteSuper cute and so easy! I made one for my cousin's baby in no time :)
ReplyDeleteI can't wait to make an adult version!
I love this! I just made the adult version with half double stitches (the single stitch seems to elude me still ... ) and I love it!
ReplyDeleteAnd the picture of you is gorgeous! :)
Thank you for the pattern!
This is such a great pattern! I made the adult version, but with half double stitches (the single stitch seems to elude me still ...) and I love it!
ReplyDeleteAnd the picture of you is gorgeous! :)
Thank you for the pattern!
As a soon-to-be crocheting novice (I have a hook and some yarn...) and a memere, I can't wait to try this project! I featured it on my blog because it was so darn cute!
ReplyDeleteIt's at http://whittskitsfabricscrafts.blogspot.com/2013/02/mining-mondays-10-terrific-diy-headbands.html
Thanks!
Carrie