Maybe Matilda: sew
Showing posts with label sew. Show all posts

Tuesday, December 10, 2013

Quick Kids Sewing Projects for Christmas

No big surprise here, but there’s not much time left before Christmas and I really am unprepared in terms of gift ideas. But I think I have some very good excuses for this procrastination . . . new baby, new business . . . Christmas definitely has not been at the top of my priority list recently. But after sewing these super easy PJ pants for Forrest for Christmas, I got excited at the idea of tackling some other simple sewing projects to give this year. And I really have to stick with fast, easy projects if I plan to get them done in the next (gasp) 2 weeks.

30 Minute PJ Pants

(Tutorial for PJ pants can be found HERE)

In case anyone else has their eyes open for last-minute sewing projects they could whip together in time for Christmas for their kids, here are some ideas that have caught my eye—and they all look adorable, quick, and easy enough to finish before Christmas.

I love the look of this baby Peasant Dress from Sew Much Ado!  It uses such a small amount of fabric, so you know it won’t break the bank, and it looks like such a quick, easy project to make. I think I’ll try my hand at making one for Darcy. Find the free pattern and instructions HERE.

Little Boy Bow Tie

And for any little gentlemen in your life, I highly recommend THIS tutorial for quick and easy bow ties from One Dog Woof. I sewed a handful of them for Forrest last year (look how little he looks in that picture above! ohmygoodness) and loved her easy instructions. They were so fast to make, and look so adorable on, and her size measurements were perfect for him (he was 2 1/2 in that picture; now almost 3 1/2 and the size still looks just right for him). Find her tutorial HERE.

According to the tutorial, these cute little skirts only take about 20 minutes to make—perfect! I have some cute fabric in mind to make one of these for Darcy. Just slip them on over a onesie and you’ve got a sweet little outfit all ready to go! The tutorial can be found HERE on Owly Baby.


I stumbled onto this little vest pattern ages ago, thinking I’d make it for Forrest, and I never got around to it. Which is sad, because I think it is SO cute! I love how simple and sweet it looks, and you could really have fun with the buttons and lining fabric to make it more exciting, if you wanted to. Find the free pattern HERE from Leila and Ben.

Are you doing any sewing for Christmas? Fingers crossed we can all get everything done on time . . . Christmas has really snuck up on me this year!

Monday, December 9, 2013

Dare to Give Handmade (Super Easy PJ Pants)

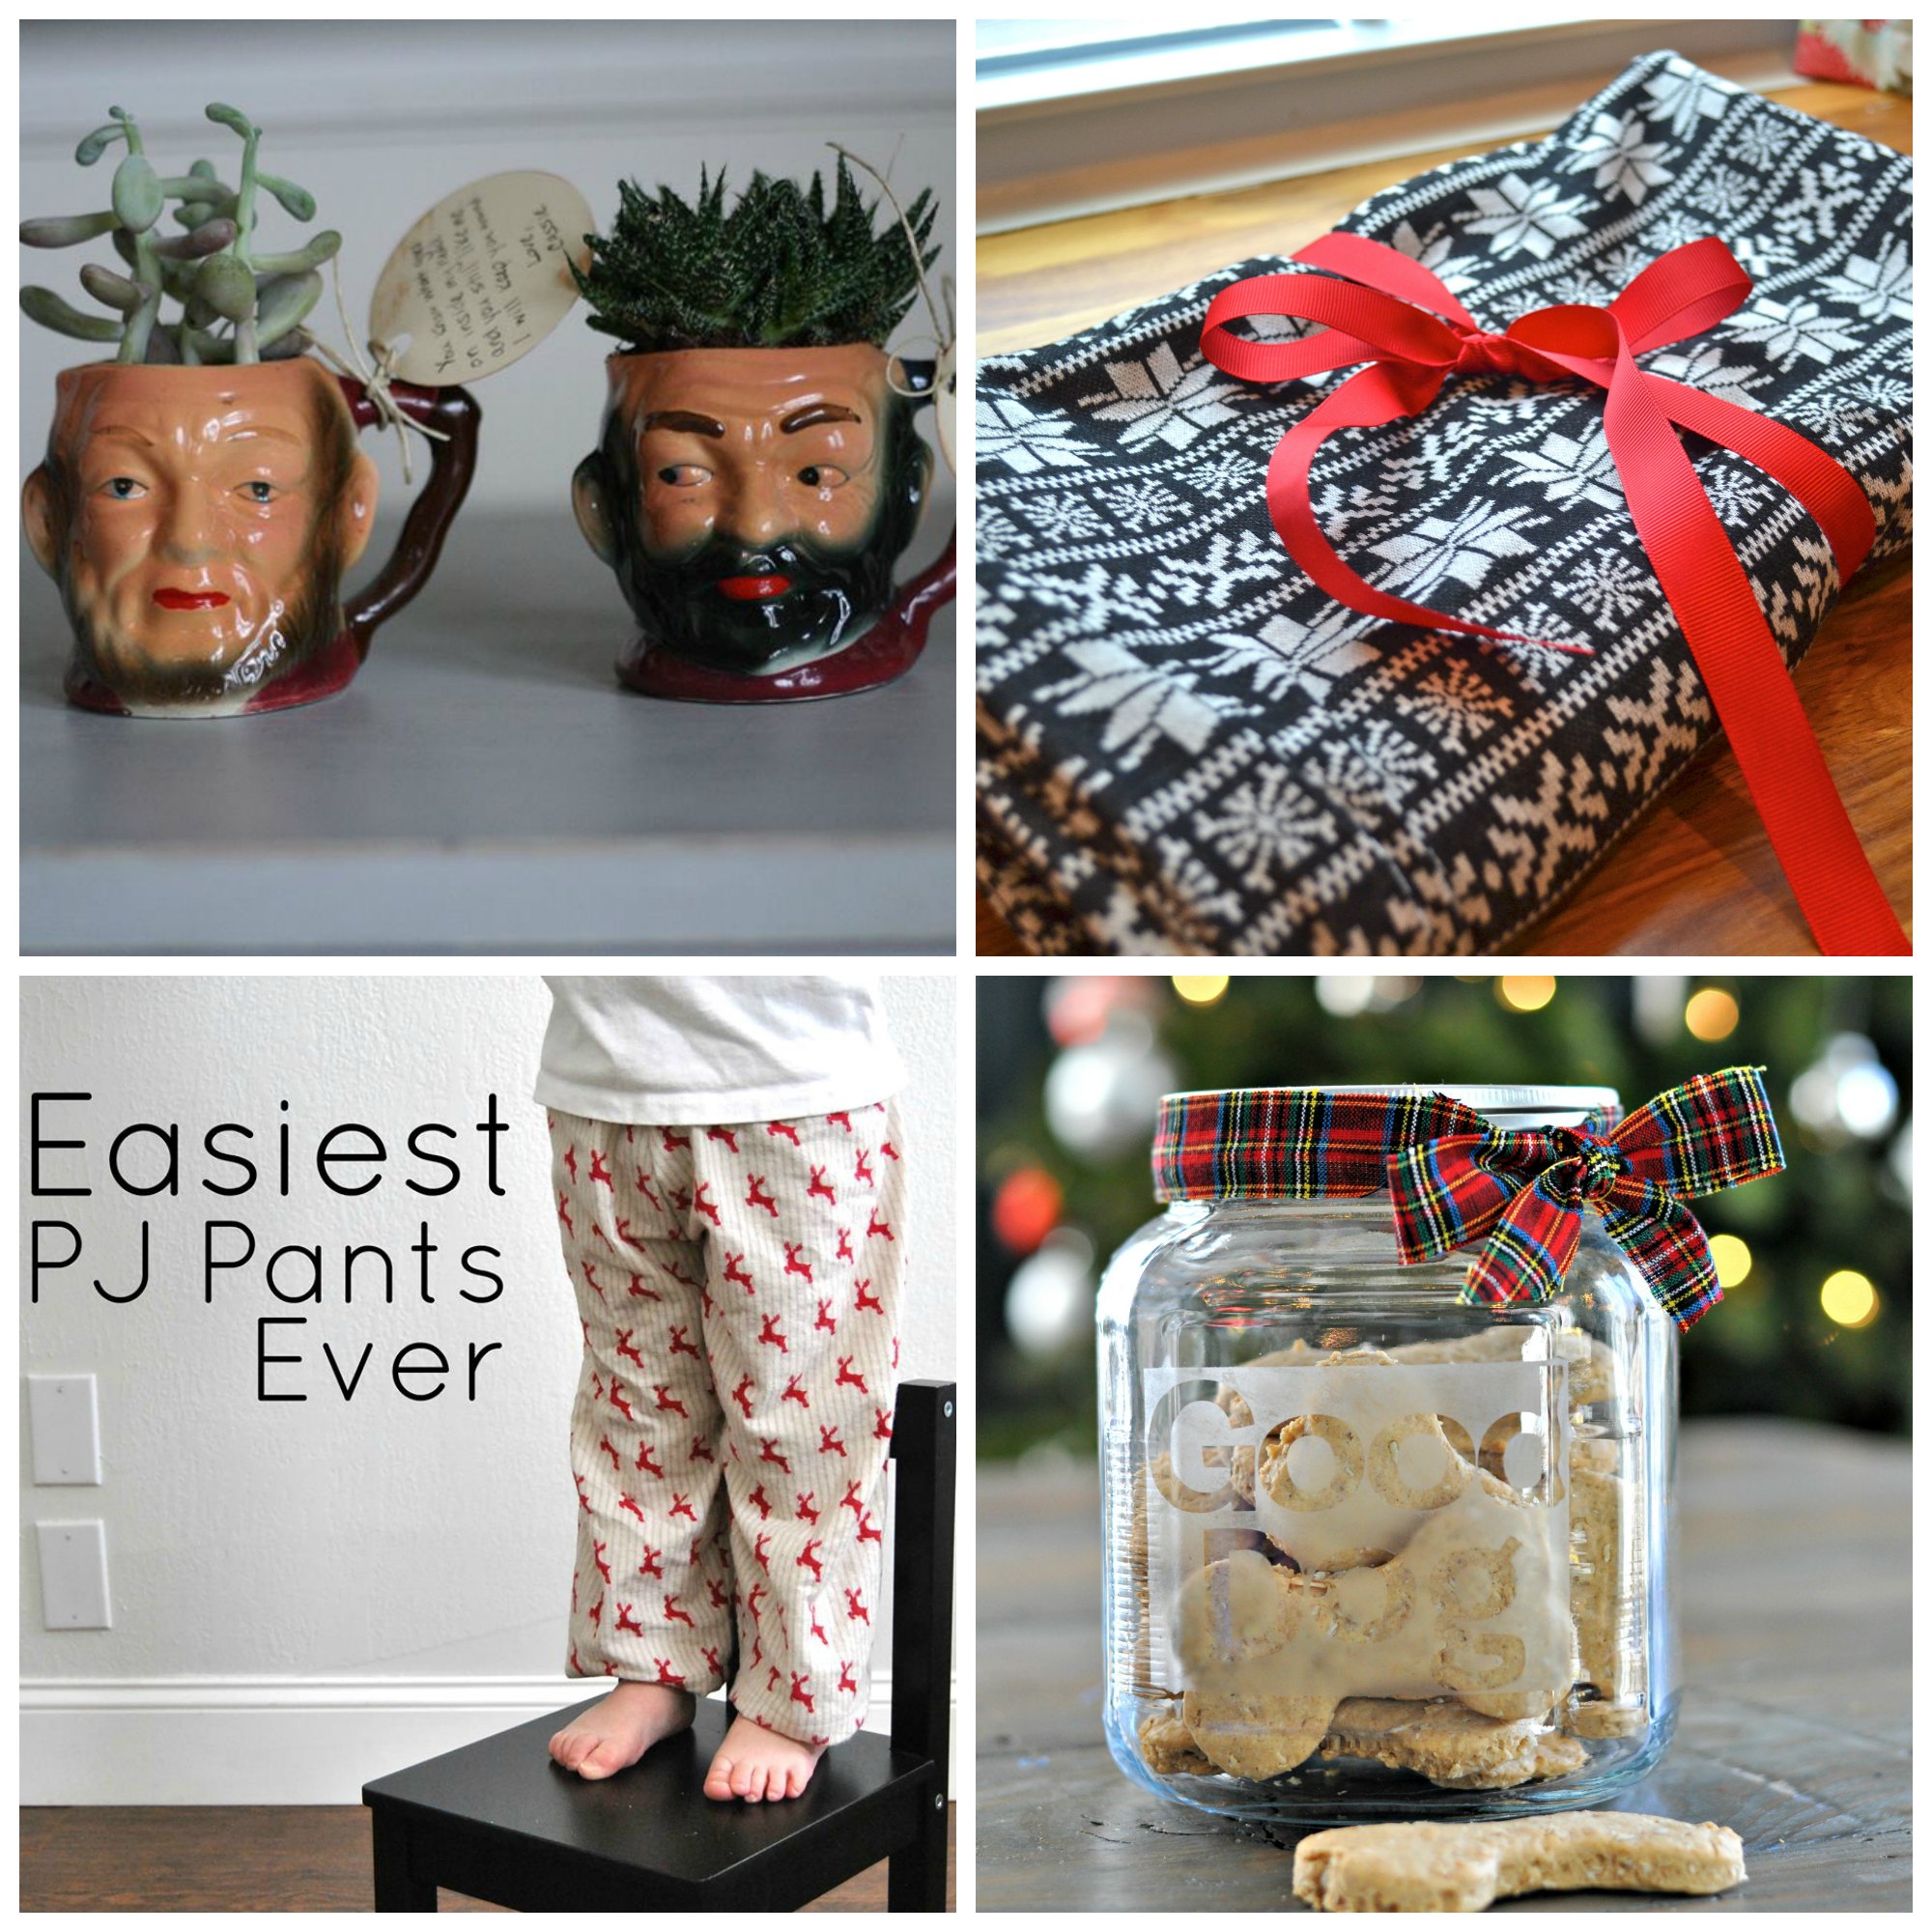
Today is Dare to Give Handmade in our Dare to DIY series! Did you make something fantastic to give as a gift this season? If so, I hope you’ll head over to Décor and the Dog to link it up! The cohosts and I were busy making goodies . . . check it out:

Give handmade(Vintage mug planters via Primitive and Proper, Winter knit infinity scarf via NewlyWoodwards, Simple pajama pants via Maybe Matilda , Good dog treat jar via Decor and the Dog - TODAY'S HOSTESS )

I waffled forever on what to make for this challenge. I couldn’t make up my mind on anything, and I knew I wouldn’t have tons of time to pull something together, so whatever I made would have to be simple and quick. Then inspiration struck while shopping at Walmart. I stopped in my tracks when I spotted this adorable reindeer flannel fabric:

2013-12-06 08.44.13

I loved it. Those little silhouettes are so cute and classic, and I instantly pictured them as a pair of Christmas PJ pants for Forrest. (And as a bonus, this fabric was under $4 a yard, and I only needed 2/3 yard! Can’t beat a price tag like that, nosirree.) That sounded like it would fit my quick + simple project requirements, and he happens to be outgrowing all his current pairs of pants (I can barely keep this kid clothed, he is growing so fast; we’re dangerously close to just cranking up the heat and letting him wander around in his undies all day for lack of anything better to wear), so it seemed like the perfect handmade project for this week.

Quick and Easy PJ pants!

And boy did they fulfill my requirements. These PJ pants were SO quick and SO simple, and I love how they turned out! I wish with all my heart that I could take credit for this awesomely easy tutorial myself, because it was honestly one of the fastest, simplest, most gratifying projects I’ve ever sewn. I love to sew, but I love enjoying the finished product even more, so I like my sewing projects to be really fast and easy. These were less than 30 minutes from start to finish. I’m not kidding. An under 30 minute sewing project, and it came out so darling! I used THIS tutorial from My Cotton Creations and can’t recommend it enough. A perfect, crazily simple way to cut and sew PJ pants so you’re done in no time at all.

Quick and easy DIY PJ pants for Christmas!

And although they are technically a Christmas present, I had to get pictures of them in action, right? I figured he needs to wear them in the weeks leading up to Christmas, you know, so we don’t ‘waste’ that cute Christmas print . . . and I had him choose another fabric that he liked so I can make a second pair that really will be a Christmas present for him to unwrap in a few weeks. No big surprise when he picked out a rather wild monster print for me to make into a second pair of PJs.

Super easy PJ pants

You’ve got the idea with these pants, right? You don’t really need MORE pictures, I’m sure. But here’s the thing. For once, I ended up with more cute pictures of him sporting his pants than I actually needed for the post (usually it’s like pulling teeth to even get ONE usable picture of this wacko), so you’ll be subjected to just one more, okay?

DSC_0305

There. I’m done now. Thank you for your patience. Now go visit Décor and the Dog, link up your project, and check out all the grand handmade gift ideas you’ll find there! And very fitting that this week’s giveaway (that you enter by linking up a project) is all awesome handmade products from amazing etsy sellers! Head to Décor and the Dog to link up and check them out.

Next week is our final stop on our Dare to DIY series, and the theme is Deck the Halls. Get busy working on a DIY project to deck your halls so you can link up with us for the final week!

Monday, December 31, 2012

Top 10 Projects of 2012

In a cruel twist of fate, my favorite projects are without fail the least popular posts here on my blog. So instead of sharing my top 10 most viewed posts of the year, I’m sharing the 10 I personally enjoyed making and sharing the most. They might not be the ones that are getting pinned and commented on the most, but they’re the projects I found the most joy in creating and using.

top10

Sidewalk Shawl—possibly my favorite crochet project to date. It was an enjoyable challenge to crochet, it’s fun to wear, and I love the look and feel of it.

Sidewalk Shawl by Maybe Matilda

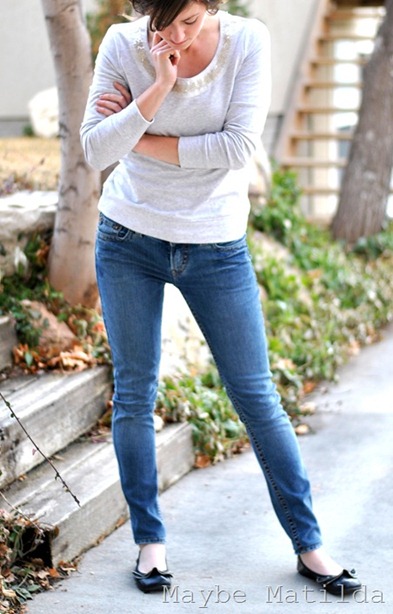
Turning Bootcut Jeans into Skinny Jeans—by no means a complicated project, but one of my most practical this year, since I was able to turn a pair of rarely worn flared wonders into one of my favorite pairs of perfect-fit skinnies.

Turn Bootcut Jeans into Skinny Jeans

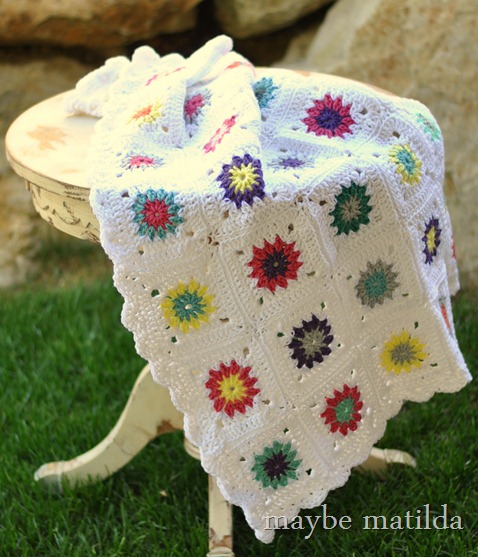
Pink Granny Square Blanket—I spent a long time resisting granny square blankets because they seemed so, well, granny. But this fun pattern made up in bright happy colors has changed my mind about granny squares. Just like grannies, they can be cool.

Pink Granny Square Blanket by Maybe Matilda

My DIY kitchen makeover—as a new homeowner who has tackled numerous DIY home projects, I can honestly say I don’t enjoy working on home projects. But the agonizing work was worth it to transform my kitchen.

Gray-and-Yellow-Kitchen-Renovation_t

Winter Ripple Blanket—I don’t seem to be capable of going too long without trying out a new blanket pattern. It’s a weakness I don’t mind indulging. This blanket was one of my first projects of 2012, and I still love looking back at the photos of it.

Winter Ripple crochet blanket

3-Step Infinity Scarf—sometimes the quick projects really are my favorite ones. This quick and simple infinity scarf is a breeze to whip up. I’ve loved wearing it this year, and always have an eye open for cute clearance fabrics so I can make more.

3 Step DIY Infinity Scarf

Queen-Size Lacy Ripple Blanket—you saw this one coming from a mile away, I’m sure. I loved making this blanket, and now I love seeing it in my bedroom every day. I’m very proud of this one!

Crochet Bedspread

Turkey Handprint Thanksgiving Shirt—another quick and easy project that was both fun to make and fun in action. Forrest and I actually had a good time making it together (shock and awe), and he looked so adorable on Thanksgiving, wearing his little turkey shirt.

Turkey Handprint Shirt

Speaking of quick and easy kiddo projects . . .

30-Minute Baby Lounge Pants—another easy one that is so useful! I used an old t-shirt to make a pair of jammie pants for the little guy, and it was a great way to give new life to an item that otherwise would have ended up in the trash while stocking the pj supply for this fellow. I actually have a stack of shirts in my craft room right now that I need to turn into comfy pants, because a certain 2-year old in my house has developed an inexplicable hatred for his footie pajamas and refuses to wear them. New PJ pants on the way.

T-shirt into Baby PJ Pants

Crochet Camera Strap Cover—I came up with this easy pattern on a whim one boring afternoon, and I’ve been so happy with it! A simple, cute way to perk up a plain camera strap, and it’s incredibly comfortable to wear around with your camera. Win.

Crochet Camera Strap Cover

Happy New Year, folks!

Friday, November 23, 2012

A ‘Grateful For’ Thanksgiving Table Runner (Dare to DIY)

Happy Thanksgiving! I hope you Americans had a lovely holiday. And I hope all you non-Americans gorged yourselves yesterday and gained a pound or two anyway. It’s the American way!

I wanted to share my project for this upcoming week’s Dare to DIY theme: Dare to Entertain. Truth be told, I’m not much of an entertainer. I rarely offer to host parties/dinners at my house, and when I do, I keep them pretty low-key. And since we had Thanksgiving at my parents’ place this year, I wasn’t sure what I could contribute.

In yet another move that I thought was 100% original until taking the matter to Pinterest and finding that I am, yet again, not the first one to think of this, I came up with this COMPLETELY UNIQUE, NEVER BEFORE DONE idea: all the loved ones who sat around the table at Thanksgiving dinner signed a table runner I had sewn in advance, and wrote something they are grateful for this year. I think it is a great way to not only start some thought about gratefulness and blessings, but to also preserve a reminder of our lives this past year (many of the messages related to that person’s accomplishments or struggles this year), and of course, adorable handwriting from the little kids around the table.

DIY Thanksgiving Grateful Table Runner

I started by sewing a simple table runner (unfortunately, I don’t have instructions for this—I made it up as I went along). I used an orange paisley fabric for a center strip and ruffles at the ends, and a beige muslin for a wide border.

As we cooked the meal, we put the table runner out and asked all the dinner guests to sign it (with a fabric marker) and write down something they are grateful for this year. The kids were excited to think of something special to them and write it down:

Make a Grateful Table Runner

And by the time dinner was served, everyone had added a special thought along with their name to the runner.

Make a Grateful Table Runner for Thanksgiving

It was fun to see what everyone decided to write, and it’ll be a great tradition as we add to the runner next year.

Make a Grateful Table Runner-001

I can’t wait to see what you Dared to DIY on Monday! Have a great weekend!

Monday, May 14, 2012

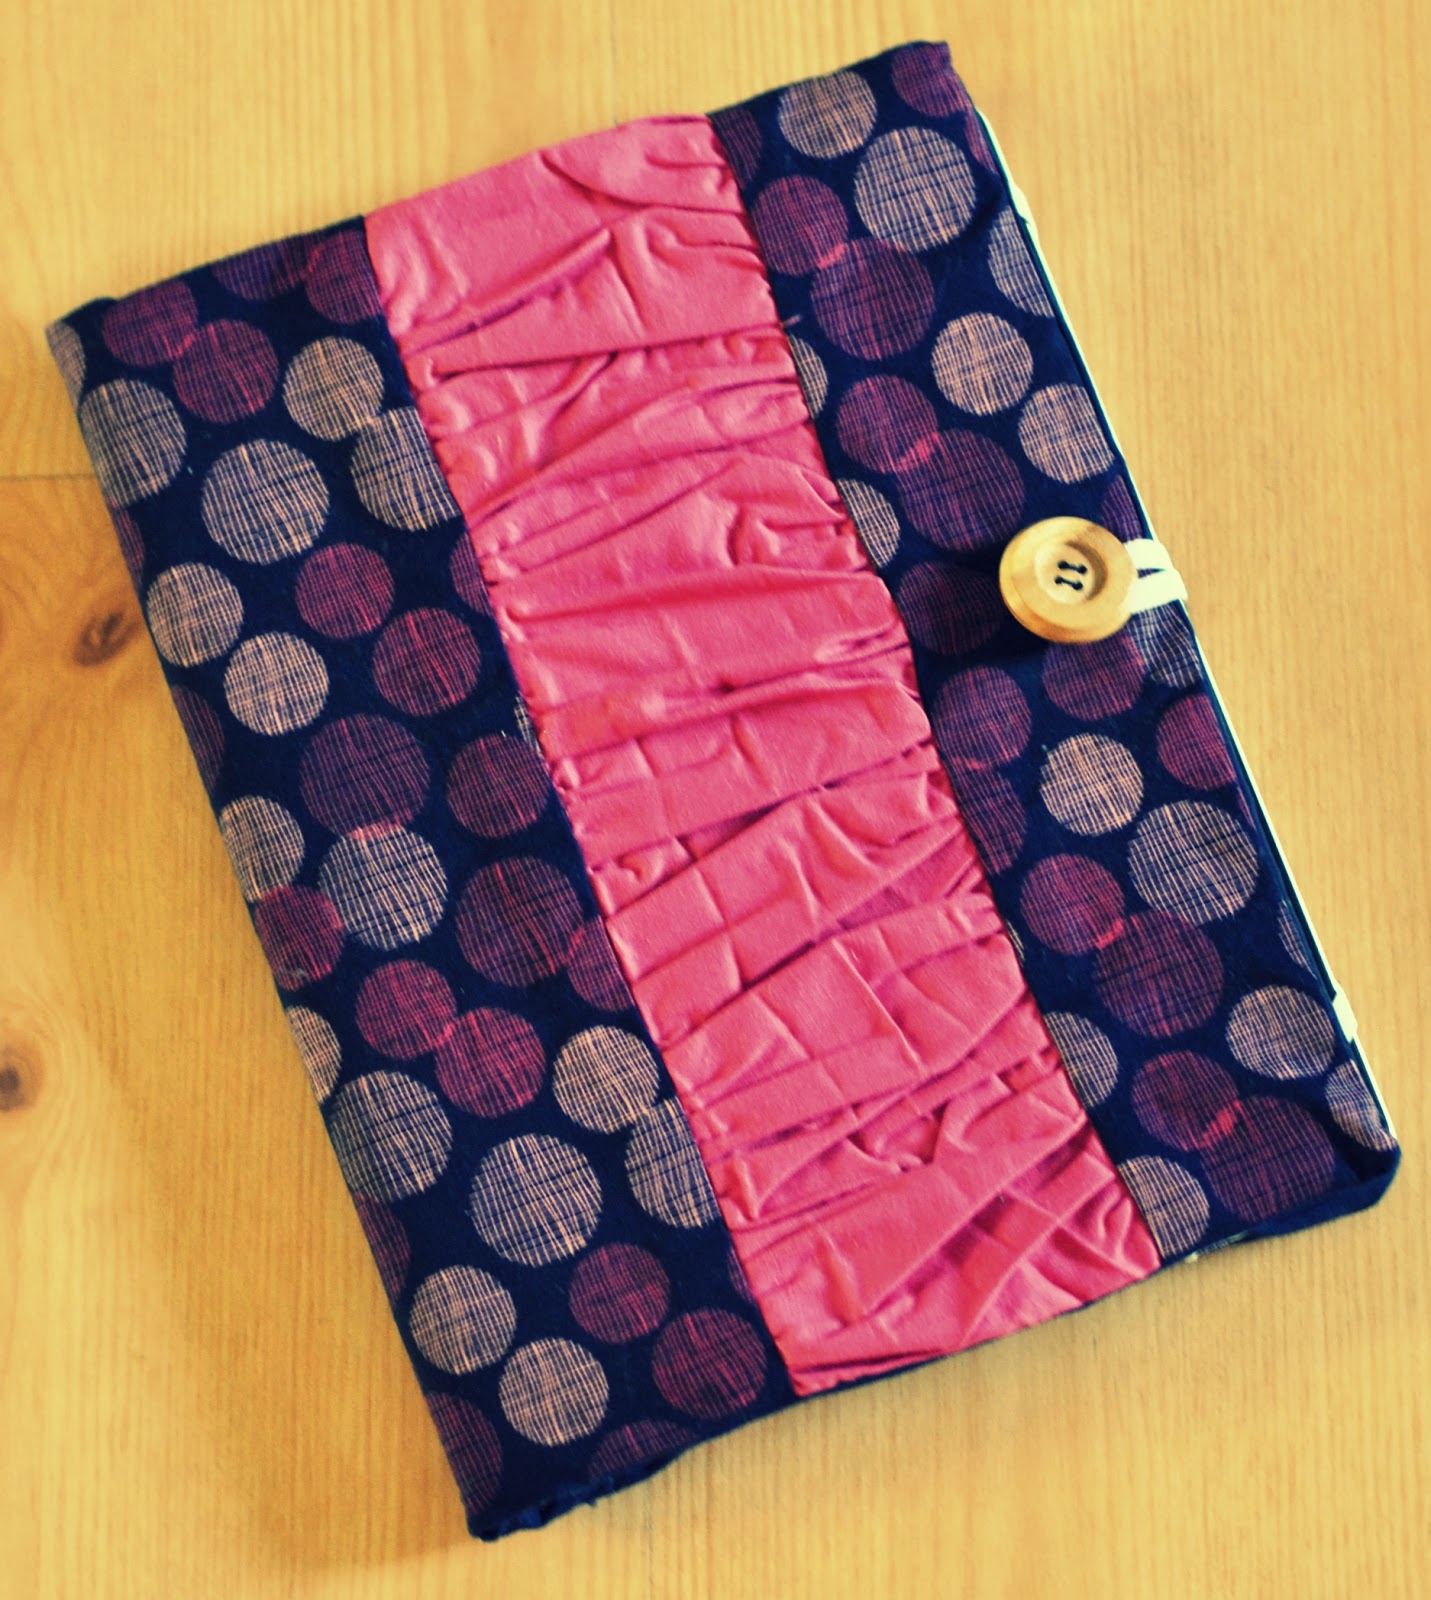
iPad Book-Style Case


My sweet mama loooves her iPad (and in her typical sweet grandma fashion, loves her grandson even more and lets him smudge it up with peanut butter fingerprints), but didn’t love the case she used with it quite as much. She had mentioned that she would really prefer a book-style iPad case that folds open and closed rather than the zip-top pouch case she had. Easy enough!

So I sewed her a book-style iPad case for Mothers Day—I used this tutorial from Made it on Monday to sew up the cover, and it was exactly what I needed. I think it came out pretty darn cute, if I may say so myself!

The elastic around the button keeps it closed when not in use, and elastic tabs on the inside hold the iPad in place. It’s nice and sturdy since it uses a composition notebook cover between the fabric layers, which is exactly the right size:

(My mom wants to make sure you all know that the iPad looks disgusting because she let Forrest play with it right before I took pictures. Shame on Forrest.)

I followed Jill’s instructions and only made a few modifications—obviously, I did the ruffle on my mom’s case differently than the tutorial shows. To do my ruffle, I just cut a big long piece of pink fabric (probably something like 30” long and 4” wide . . . I didn’t measure) and ruffled it along both long sides by sewing a long, loose stitch and gathering until it was the same length as the piece of fabric used for the outer cover. Then I sliced my outer cover piece roughly where I wanted the ruffle to go, and sewed in the ruffle, right sides together, then trimmed down the entire outer piece to make sure it was the correct size.

I also added fusible fleece interfacing to all the fabric pieces, inside and out, so that it would be sturdy and cushy . . . now it has a sturdy build (from the composition notebook cover in the middle), and it’s padded inside and out thanks to the fleece interfacing.

If I were to make it again, I think I might add a pocket to the inner left side to hold little notes or cards or whatever . . . but then again, I don't own an iPad, so I have no idea how useful that would actually be.

If you’re looking for a tutorial to make a case like this, check out Jill’s instructions!

Monday, March 19, 2012

5 Berries Dresses (and pattern giveaway)

It’s official: I’m going to need a daughter someday. You got that, Universe? Message received? I sure love my little fellow, but I can’t deny that sewing for little ladies is just a lot more fun than sewing for misters.

DSC_0550a My little niece up there thinks so, too.

Tanya from 5 Berries Sewing Patterns offered me a pattern to sew up and review, as well as over $70 in patterns to give away to you guys . . . yowza!

 Untitled-2

I chose the Eloise Dress pattern—I loved the classic shape and the playful, feminine ruffle around the keyhole . . . adorable!

DSC_0546b It was so much fun to sew, and I love the finished dresses on my pretty nieces! I think they like their new dresses, too . . . their mom reports that they refused to take them off for the rest of the day, even after a rough-and-tumble playground session in them (during an afternoon that was probably a tad chilly for sleeveless outfits). I’ll consider that a success.

DSC_0554 All right, let me tell you a little about the pattern and my thoughts on sewing with it. All of the patterns from 5 Berries are instant downloads, which is awesome—that means no waiting for the pattern to be emailed or snail-mailed to you. When I buy patterns, I’m excited to start them now, so it’s awesome to be able to get going right away without a wait!

The pattern itself was extremely detailed and well-written. I always get a little nervous sewing clothing—I love to sew, but clothing is not my forte and I don’t have tons of experience sewing clothing from start to finish. But even though the pattern I chose is rated an intermediate level, I didn’t have any major issues while working on it—the instructions were well-written and detailed, and there was a photo to help explain every step along the way. The only question I had while sewing might be obvious in the picture above—the skirt isn’t as full and gathered on the black/white dress as the pink version of the dress, because I misinterpreted the instructions and only cut the skirt half as wide as I should have—whoops! It still came out adorably cute and is plenty wide for playing in, and Tanya even changed the directions in the pattern to make it clearer so no one else will make my silly mistake again. It’s pretty near foolproof now!

DSC_0542 My favorite feature of the pattern was the plentiful photos throughout—I find that so helpful when I’m sewing! The directions themselves were clear, but there were photos for every step, making it almost impossible to mess anything up or misinterpret instructions. I loved having the photos to refer to as I sewed . . . they really helped me create a more professional-looking product and avoid unnecessary mistakes.

DSC_0555 I even learned an important sewing skill that I’ve been terrified to try until now: buttonholes! I love the look of the buttons on this dress . . . it almost reminds me of a wedding dress with buttons from the neck to the hemline. And of course I had to go with purple buttons and a purple sash for this little princess’s dress. I’ll give you three guesses on her favorite color. (Answer: “poh-pole.”)

(And if the dresses look a little short on the girls, that’s my fault . . . I didn’t measure them for sizing [naturally] and didn’t take into account how tall they both are for their age! They’re definitely above average in the height department, so I should have cut the skirts a tad longer. Next time.)

collage And despite the dressier style, these dresses also make great outfits for playtime. They have plenty of room for little ones to climb, and run, and slide, and swing.

DSC_0521 Ahem. What? I had to try it on someone before giving it away! Jeff was horrified that I would put our son in a dress, but found comfort in the fact that he was clearly not enjoying himself.  Unlike a certain photo I have of Jeff himself as a toddler in a dress and hairbow, where he’s beaming and laughing in his getup. I’ll resist posting that picture. But I can’t help but notice that Forrest looks rather darling in that dress, wouldn’t you agree?

Okay, now for the giveaway!

5 Berries is offering two prizes today—a first place winner will receive $50 in patterns of their choice, and a second place winner will receive $22 in patterns of their choice!

To enter to win:

1) Visit 5 Berries Sewing Patterns, then come back here and leave a comment telling me your favorite pattern from the shop.

2) Give this giveaway a shout-out on facebook (something like: “I’m entering to win $50 worth of children’s clothing patterns from 5 Berries on Maybe Matilda!” with a link to this giveaway page), then leave a comment telling me you did so (as well as a link, please!).

There you have it! Please leave separate comments for each entry, and make sure I have a way to reach you, either by including your email address in your comment or by enabling email on your Google account (follow the instructions here).

One last thing!  Whether you win the giveaway or not, posting a link to this giveaway on your facebook page will earn you a 30% discount to use at 5 Berries on any amount of patterns! (I forgot to discuss with Tanya how to get/use your coupon code, so I’ve sent her an email and I’ll post with details later about how to redeem your coupon! Check back soon!)  

Monday, February 27, 2012

30 Minute Baby Lounge Pants (from an old t-shirt)

I’ve re-fallen in love with sewing lately. It was hard, for a while, to get excited to sew when that meant lugging out a clunky sewing machine that was so tired and sick and senile it could hardly get through 2 or 3 inches of stitches before getting stuck or tangled or just slipping quietly into a coma. But the new machine I got for Christmas was sent straight from heaven, and I’ve been having such a great time starting projects I’ve put off for months and rediscovering a favorite hobby that had almost been ruined by an uncooperative machine.

One quickie project I’d wanted to try for months (but wasn’t willing to sacrifice to the old demonic sewing machine) was refashioning an old long-sleeved thermal top into baby pajama pants. My sister (who graciously gives me all her old thrift-store-bound clothes so I don’t have to go buy them back from the thrift store) gave me this old shirt, thinking maybe I could use it for a project. It looked to me like it would make the perfect pair of comfy-cozy baby lounge pants. And 30 minutes later, it was a pair of comfy-cozy baby lounge pants!

pants

If you’ve seen many of my sewing projects, you know that my favorites are the super-fast, super-simple, low-fuss ones. Sure, it’s fun now and then to sew something a little more fancy and intricate, but my very favorite things to sew are almost always the simple, quick projects that don’t require much time or skill. I sure love instant gratification. Part of the reason I put this project off for so many months is because I kept trying to make it more complicated than it needed to be—first I thought I’d use the sleeves as legs, then use the body of the shirt to make a matching pajama top . . . and after months of setting it aside, I finally said to myself, “Self, cut it out. Just make it a simple project and be done with it.” I can be so wise sometimes.

Here’s what you’ll need to make a pair of cute and quick baby lounge pants:

- an old t-shirt or thermal top

- a pair of pants that fits your kid to use as a pattern piece

- elastic

- sewing machine, matching thread, etc.

1. Start by turning the top inside out and laying the pants on it, lining up the bottom of the legs with the shirt’s bottom hem (make sure the front and back layers of the shirt are even and flat). These Spongebob pants were getting a little short on Forrest, so I left a little space between the pant legs and the shirt hem to make a longer pair. (I took this picture before I realized the shirt should be inside out, so ignore that—make sure the top is turned inside out!)

DSC_0519

2. Cut around the shape of the pants, through both layers of the shirt, about 1/2” away from the pants along the legs. Cut further away from the waistband on top (about 1 to 2”) to leave room to make a casing for an elastic waistband. Don’t cut the bottom hem of the shirt off—by leaving it intact, it works as the leg hem so you won’t have to do that part yourself. Yay! (If you want wider, yoga-style pant legs, just cut further away from the pants. I was going for tight-fitting, legging-style pajama pants, so I cut the fabric pretty close to the pants.)

DSC_0523 

3. Pin the two shirt layers together along the outer and inner legs. Don’t pin along the waistband or the foot opening at the bottom.

DSC_0524

4. Sew the layers together along the outer leg and inner legs, using a 1/2” seam allowance. Don’t sew along the waistband or the bottom of the legs.

DSC_0526

5. Now we’ll make a casing for an elastic waistband. Fold the waist of the pants down about 1/2”, like so, and press: (the pants should still be inside-out, so you’re folding toward the wrong side of the fabric, or what will be the inside of the pants)

DSC_0527 . . . then fold it over again so it’s a tad bigger than the width of your elastic:

DSC_0528 And pin it in place.

6. Sew along the bottom edge of the fold:

DSC_0529 

. . . and stop sewing before you get back to where you started, so you’ll have an opening of about 2 inches that you can use to insert your elastic:

DSC_0530

7. Cut a piece of elastic so it’s about an inch smaller than your child’s waist size, and insert it through the waistband opening:

DSC_0531 And sew the two ends of the elastic together:

DSC_0532

8. Now just sew down that last inch or two of waistband that you left open, and you’re finished!

DSC_0533

You’ve got yourself a really fast, really simple pair of cute baby lounge pants.

DSC_0542 You can’t put a man in lounge pants and expect him not to lounge. Forrest watched The Cat in the Hat in total comfort, thank you very much.

DSC_0546 We take our relaxing seriously around here. Brother was completely uninterested in this photo business.

DSC_0552But I think he looks awfully cute and snuggly in his little lounge pants.

Related Posts Plugin for WordPress, Blogger...