Maybe Matilda: thrifty
Showing posts with label thrifty. Show all posts

Sunday, September 14, 2014

That time I was on TV

Alternate title: A Beginner’s Guide to Giving Oneself Ulcers and Insomnia

Remember how I’m an introvert? And that one time I wrote about how I don’t do things I sometimes secretly want to do because they make me nervous and I’d rather just stay comfortable than do something scary even if it could, potentially, also be cool or fun or rewarding or whatever? Yes? Okay, I just want to make sure we’re all on the same page about how much I don’t want to be the center of attention, and don’t like people looking at/listening to me, and don’t do scary things, because it’ll make you extra proud of me for being brave. And that’s why I blog, really. Just want you all to be oh-so-proud of me.

I got quite the unusual email about 2 weeks ago. I even had to read it through a few times to make sure I was understanding it correctly and that it had in fact been sent to me on purpose, because it just didn’t seem right that the sender of this email actually meant to invite me to do a segment on a local lifestyle TV show. Me. On TV. Me. Surely you can understand my confusion.

This gentleman from Savers, who was very nice but also very likely confused about who he was contacting but was too polite to backtrack and tell me to get lost, wanted to know if I would like to represent the company on Fresh Living, a local Utah show, by thrift shopping at Savers for 3 fall outfits (without spending more than $50 per outfit), and sharing them on the show.

I had about 5 days before the segment was taping, and spent a good 24 hours sitting on and stewing over that email, alternately telling myself, “Hey, this could be kind of cool! How flattering that someone saw my blog and thought that I might not be a total PR disaster on television!” and “Are you insane? Tell him no. SAY NO NOW.” Jeff (who, I believe I’ve mentioned before, definitely leans in an extroverted direction) seemed shocked that I would even consider turning it down, and insisted it would be cool and great and I should say yes right away. My mom responded to my panicky text message about it within 10 seconds with a very confident “do it, it’ll be good for you” (as if I am in need of a strong dose of medical-grade extroversion) (perhaps I am—she is always right). So, with much nervousness and apprehension, I replied with a yes.

Which gave me roughly 4 days to gather 3 models and 3 fall outfits, thrifted from Savers, to present on the show. Finding the outfits was cake—one nice thing about this offer was that, well, I already love and shop at Savers often (if DI had called on the other hand—boo, hiss, a pox on you, DI!). But the models. I am not exaggerating when I say that I couldn’t think of anyone I know—not a single solitary soul—who would be interested in modeling an outfit on TV. No one. This was the source of the majority of my self-induced ulcers (I am mostly kidding about the ulcers, but sort of not, because I have had mysterious stomachaches for like 2 weeks now, so I’m going to go ahead and call them ulcers because it sounds suitably dramatic for this post).

Jeff’s receptionist at work came to the rescue—he mentioned that I’d be doing the segment without telling her that I was desperately seeking modeling help, and she said something like, “Oh, that sounds fun, and I’ve modeled before! Does she need models for it?” YES, YES ACTUALLY I DO, thank you for asking. She rounded up her younger sister and a friend, and just like that, I had my 3 models, ready to go.

So the morning of the taping arrived. I had about an hour in the morning to get things ready before my mom was set to arrive to watch the kids so I could head up to Salt Lake to tape the segment. About 10 minutes before I had to leave my house, I got a text saying the receptionist’s friend had backed out and wouldn’t be coming to do the show. OF COURSE SHE BACKED OUT, because of course the one time I convince myself that I can manage to do something bold and big and scary, it all falls apart at the last minute. A very good reason, I was telling myself, that I should stick with my normal routine of never doing anything new!

I called my sister to see if she could step in at the last minute—busy working. With great trepidation, because I knew there was no way she’d actually want to do this, I called my sister-in-law Nicole to see if she could fill in. By some miracle, she had the day off from work, and was feeling extra nice that day, and said yes. I knew she didn’t want to do it, but this is what family is for: guilt-tripping people into doing things they don’t want to do by calling them in an emotional tizzy and almost breaking down in tears of desperation on the phone. She had something like 15 minutes to get off the treadmill (I am very grateful that she answered the phone mid-workout!), get showered and ready, and get out the door to make it to the studio in time for our segment (and of course she looked amazing when she got there despite the time crunch, because she is one of those people who doesn’t ever not look amazing) (try standing next to her in a family photo sometime if you’re in the mood for a real gut-punch to the ol’ self-esteem).

One last model mayhem tidbit: all 3 of the outfits I had purchased were practically baby-sized, since all 3 of my planned models are itty bitty petite little things. So I had 3 size 1 outfits, and one last-minute sister-in-law model who is my size. I put Nicole in the outfit I had been planning to wear (it was, in fact, from Savers [lucky!], although I’ve had it forever and didn’t buy it during the same shopping trip that I bought the models’ outfits), and I just grabbed something else to wear.

Somehow, everyone arrived in one piece and in relative calm at the studio. (Can you believe you’ve read 9 paragraphs already and we just got to the studio? Brevity, thy name is Rachel.) The experience at the studio was so much different than I had expected. I thought we’d stroll in, be ushered around like a bunch of hot shots (ha!), maybe chat with someone on the show’s staff about how the segment would go, what questions I’d be asked, what I should say (or not say), etc. Here’s what actually happened: we got shuffled around from one spot to another for a good 20 minutes, then were left outside alone for a while longer (“A cameraman will show up soon, just hang out here!”). Someone gave us a 10-second brief on where to look (me: not at the camera; models: into the camera), then all of a sudden the show hosts arrived out of nowhere and we got a 30-second countdown from the cameraman before he started taping. It was all over in like 3 minutes, and afterward, I honestly could not recall a single thing I had said. Truly, I spent the entire drive home trying to remember what I had just said on TV and couldn’t come up with anything except remembering that I’d said “stuck her in” at least twice (like, “We stuck her in this cute jacket!” Why, why would I say it like that? Twice, no less!), and could distinctly recall bumbling over some wording near the end. I was dreading watching our segment when the episode aired later in the day, but after I saw it (and then rewatched it 3, 4, 5 times), I decided, all in all, it wasn’t so bad. I wish I had planned out more specifically what I was going to say about each specific outfit (I had an idea of what I wanted to say in terms of an introduction, but hadn’t really planned out exactly what to say while walking through the outfits, and it showed), and I really wish I’d gotten a chance to talk with someone beforehand about what questions the hosts would be asking. I was too nervous to come up with anything coherent on the spot when they asked questions (case in point: my little brain-fart moment near the end—thankfully, the hosts must be very used to smoothing over bumbling guests by this point in their career, and they stepped right in and rescued me very gracefully).

All in all, I think it was a good experience. Prepping the outfits was a lot of fun, and if I were to ever do something like this again, I think it would be a lot less stressful now that I know more or less what to expect from doing a TV segment. I think if I hadn’t had to deal with getting my own models, I would have had like 80% less stress overall. And so far, only 1 real-life acquaintance has mentioned seeing me on the show, so I can rest easier knowing that almost no one watched it :-)


Next stop: Ellen.

Friday, March 21, 2014

Crisis of (Thrifting) Faith

Over the past few years, the unthinkable happened. What was once a rich, thriving faith for me—a long-held belief that sustained me during bleak moments and heart-wrenching trials—eroded and decayed until nothing remained but a black hole of bitterness and pain.

I lost my faith in thrifting.

I could remember a time when just entering a thrift store filled me with joy, hope, and promise. But something changed. Too many dashed thrifting dreams and unanswered thrifting prayers turned me cold and angry. I longed for the fullness and happiness the old days of thrifting had brought.

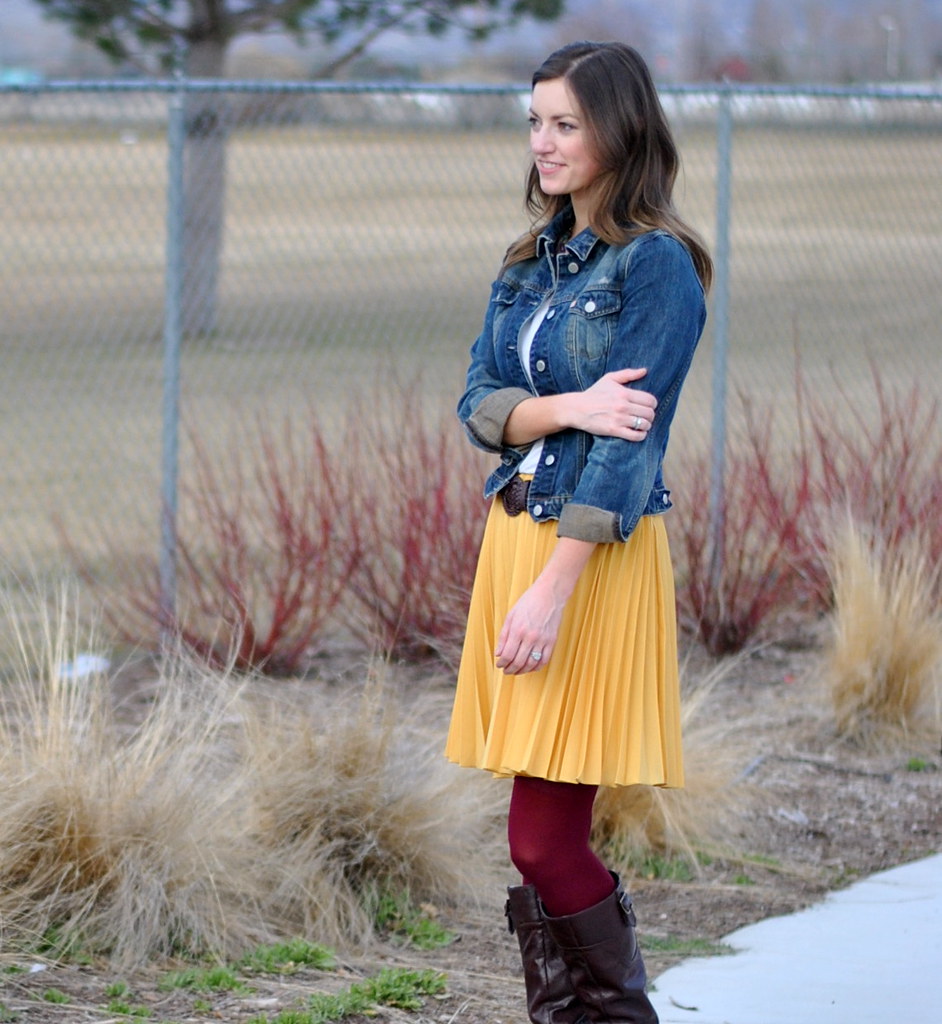
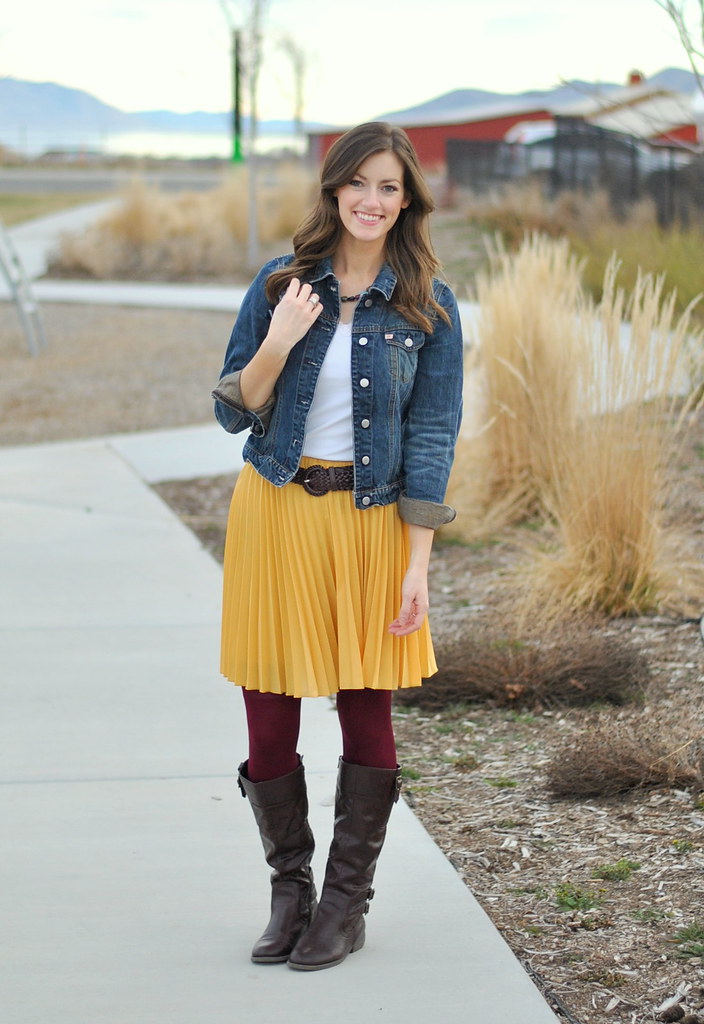
denim jacket + yellow skirt + maroon tights + boots

I’ve wanted a jean jacket for such a long time, and was too stubborn to pay full price. It just seemed like the sort of thing I should be able to find at a thrift store. So I searched, and waited, and got frustrated over and over when I couldn’t find anything I liked. I blame Utah. The thrift stores here are disappointing. (If anyone has suggestions, please let me know, because DI has broken my heart too many times.)

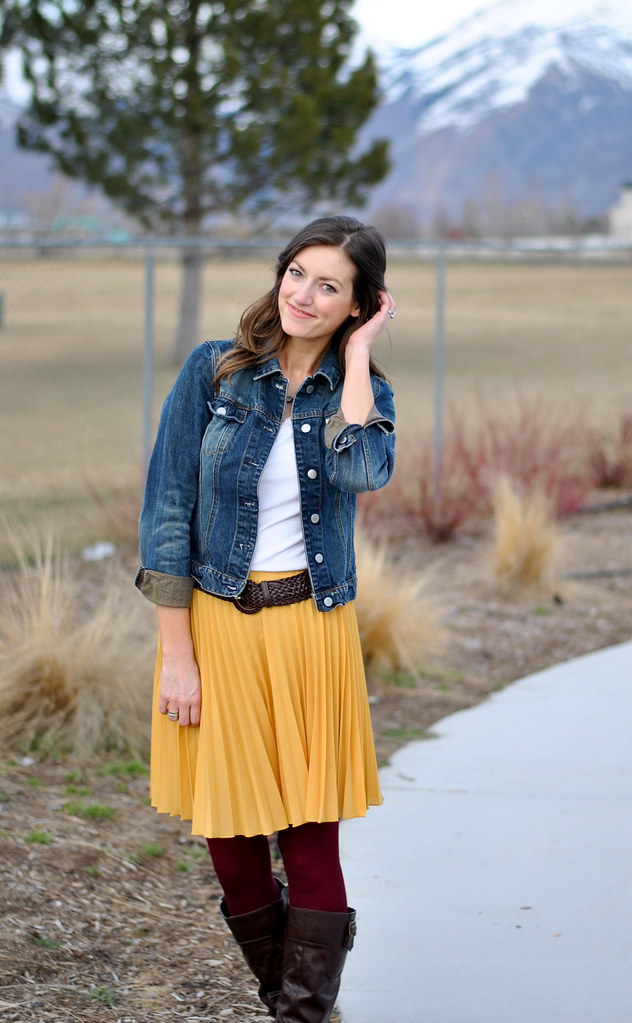
denim jacket + yellow skirt + maroon tights + boots

And finally! Success! After many fruitless shopping trips, I managed to find one that was just what I was looking for. My thrifting faith has been restored, and now I’m practically itching to hit up a thrift store again. All it takes is that one good find to get you back on the wagon. I’ve missed good thrifting.

denim jacket + yellow skirt + maroon tights + boots

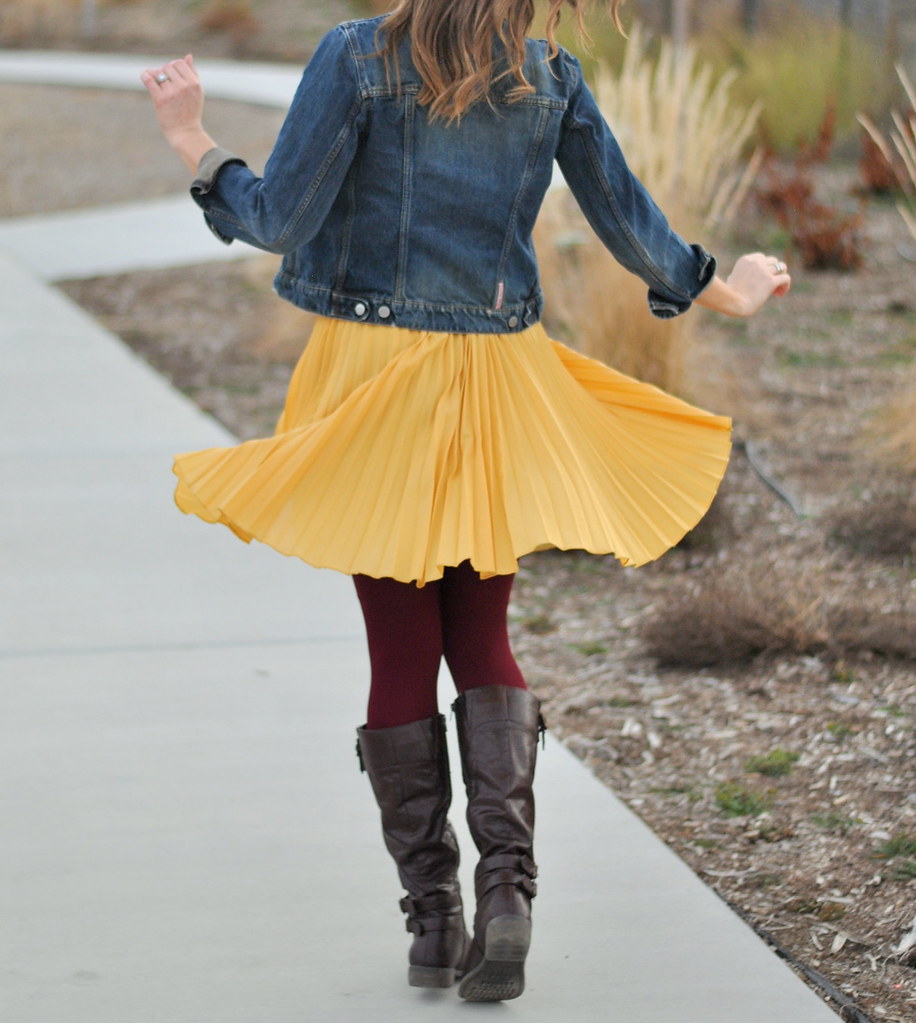
And I know we’re all thinking it, so let’s just get down to brass tacks. Can a girl—nay, a grown adult woman—resist the urge to get her twirl on when wearing a pleated skirt?

The answer is no. No, she cannot.

denim jacket + yellow skirt + maroon tights + boots

Jacket: thrifted (!!!muchrejoicing!!!) // Top: Walmart // Skirt: c/o Chicwish // Tights: c/o We Love Colors // Boots: Gift // Belt: came with a different skirt

Have you had any great thrifting finds recently? If you live in Utah Valley, will you share your thrifting secrets with me? Because DI is just not cutting it for me.

Wednesday, January 23, 2013

Rustic ‘Love’ Letters

That title kind of makes it sound like this post is about the sort of letters lovers send each other, doesn’t it? As for the rustic part . . . maybe they are very outdoorsy types? And the letters are composed in a cabin in the woods somewhere? I’m sorry to disappoint you, but these rustic love letters aren’t those rustic love letters. I’m talking about these ones:

Rustic 'Love' Letters from Maybe Matilda

I made these to go with my neutral, rustic Valentine’s display, and I really like how they came out. Although I can appreciate and enjoy Valentine’s décor that screams glittery red-and-pink greetings in your face, I wanted something a little softer for my place. This little display only cost a few dollars, it’s going to be reusable for Christmas next year by switching out a letter, and it’s not too traditionally loud for Valentine’s day, I could definitely get away with using it year-round as regular décor. Win-win-win.

To make these letters, I just picked up a few items from Hobby Lobby—a mini-twig wreath to stand in as the ‘o’ (it was $2.50 if I remember correctly), and a few paper mache letters (also $2.50 each, but wait for them to go on sale before you buy—they were 30% off when I bought them a week or two ago!). I picked up an L, V, and E, as well as an N. That way, I can scramble the letters/wreath to make ‘Noel’ to use in Christmas displays next year. Smart, eh? I have my moments.

How to make rustic faux-distressed 'Love' letters

Now, back when I was searching for a nice gray wall color for my house, I bought something like a dozen gray sample paints. So I just popped out one of those tiny sample size paints to use on my letters. It’s a very soft gray, but mostly reads as white, which is fine. Go ahead and paint your letters.

DIY 'Love' Letters for Valentine's Day

(Don’t you paint on your stovetop?)

Now, I wanted them to have a rustic ‘worn’ look. But sanding paint off a paper mache letter to get that distressed look didn’t seem brilliant to me. I don’t know, maybe it would work fine, but I wasn’t willing to try it and potentially ruin my super-expensive $2.50 – 30% off letters. So I tried a different route. I just grabbed some brown craft paint, got the teeniest tiniest bit on my brush, and ‘flicked’ it over the edges of the letters to make them look worn out and distressed.

Faux-Distress Painted Letters

I’m not sure how best to describe this. Just make sure there’s not much paint on your brush (I barely dipped it into the paint, then dabbed most of it off onto a piece of paper so it was just barely barely barely moist with paint), placed the brush right on the edge of the letter and ‘flicked’ it forward/upward. It’ll give it a sort of bristly, worn-off, splattery look. The important points here, I learned by sad experience, are to 1) make sure there is not much paint on your brush—too much paint and it’ll look sloppy instead of shabby chic, and 2) if you make a mistake, just forget it and keep going. You’ll do more harm by trying to rub it off and reapply than by just moving on. Really.

How to faux distress letters with paint

By focusing your faux-distress painting around the corners, it’ll look more natural, so go a little heavier around the corners and a little lighter on the other edges.

I used a tiny picture frame easel/plate stand thing to prop up the ‘O’ and just pulled the sides open a little wider so they’d essentially be hidden by the ‘O’. It worked out just fine. There you have it!

How to make a rustic 'love' sign

Monday, February 27, 2012

30 Minute Baby Lounge Pants (from an old t-shirt)

I’ve re-fallen in love with sewing lately. It was hard, for a while, to get excited to sew when that meant lugging out a clunky sewing machine that was so tired and sick and senile it could hardly get through 2 or 3 inches of stitches before getting stuck or tangled or just slipping quietly into a coma. But the new machine I got for Christmas was sent straight from heaven, and I’ve been having such a great time starting projects I’ve put off for months and rediscovering a favorite hobby that had almost been ruined by an uncooperative machine.

One quickie project I’d wanted to try for months (but wasn’t willing to sacrifice to the old demonic sewing machine) was refashioning an old long-sleeved thermal top into baby pajama pants. My sister (who graciously gives me all her old thrift-store-bound clothes so I don’t have to go buy them back from the thrift store) gave me this old shirt, thinking maybe I could use it for a project. It looked to me like it would make the perfect pair of comfy-cozy baby lounge pants. And 30 minutes later, it was a pair of comfy-cozy baby lounge pants!

pants

If you’ve seen many of my sewing projects, you know that my favorites are the super-fast, super-simple, low-fuss ones. Sure, it’s fun now and then to sew something a little more fancy and intricate, but my very favorite things to sew are almost always the simple, quick projects that don’t require much time or skill. I sure love instant gratification. Part of the reason I put this project off for so many months is because I kept trying to make it more complicated than it needed to be—first I thought I’d use the sleeves as legs, then use the body of the shirt to make a matching pajama top . . . and after months of setting it aside, I finally said to myself, “Self, cut it out. Just make it a simple project and be done with it.” I can be so wise sometimes.

Here’s what you’ll need to make a pair of cute and quick baby lounge pants:

- an old t-shirt or thermal top

- a pair of pants that fits your kid to use as a pattern piece

- elastic

- sewing machine, matching thread, etc.

1. Start by turning the top inside out and laying the pants on it, lining up the bottom of the legs with the shirt’s bottom hem (make sure the front and back layers of the shirt are even and flat). These Spongebob pants were getting a little short on Forrest, so I left a little space between the pant legs and the shirt hem to make a longer pair. (I took this picture before I realized the shirt should be inside out, so ignore that—make sure the top is turned inside out!)

DSC_0519

2. Cut around the shape of the pants, through both layers of the shirt, about 1/2” away from the pants along the legs. Cut further away from the waistband on top (about 1 to 2”) to leave room to make a casing for an elastic waistband. Don’t cut the bottom hem of the shirt off—by leaving it intact, it works as the leg hem so you won’t have to do that part yourself. Yay! (If you want wider, yoga-style pant legs, just cut further away from the pants. I was going for tight-fitting, legging-style pajama pants, so I cut the fabric pretty close to the pants.)

DSC_0523 

3. Pin the two shirt layers together along the outer and inner legs. Don’t pin along the waistband or the foot opening at the bottom.

DSC_0524

4. Sew the layers together along the outer leg and inner legs, using a 1/2” seam allowance. Don’t sew along the waistband or the bottom of the legs.

DSC_0526

5. Now we’ll make a casing for an elastic waistband. Fold the waist of the pants down about 1/2”, like so, and press: (the pants should still be inside-out, so you’re folding toward the wrong side of the fabric, or what will be the inside of the pants)

DSC_0527 . . . then fold it over again so it’s a tad bigger than the width of your elastic:

DSC_0528 And pin it in place.

6. Sew along the bottom edge of the fold:

DSC_0529 

. . . and stop sewing before you get back to where you started, so you’ll have an opening of about 2 inches that you can use to insert your elastic:

DSC_0530

7. Cut a piece of elastic so it’s about an inch smaller than your child’s waist size, and insert it through the waistband opening:

DSC_0531 And sew the two ends of the elastic together:

DSC_0532

8. Now just sew down that last inch or two of waistband that you left open, and you’re finished!

DSC_0533

You’ve got yourself a really fast, really simple pair of cute baby lounge pants.

DSC_0542 You can’t put a man in lounge pants and expect him not to lounge. Forrest watched The Cat in the Hat in total comfort, thank you very much.

DSC_0546 We take our relaxing seriously around here. Brother was completely uninterested in this photo business.

DSC_0552But I think he looks awfully cute and snuggly in his little lounge pants.

Monday, August 8, 2011

Happy Lamp Makeover

I normally don't really get into home decor projects too much--I love seeing what other people make, but I just haven't ventured there myself, up until this recent move when I decided I was tired of living in a place that didn't look at all like me. So hopefully you don't mind the little break from my normal sewing and crochet projects while I decorate my place. And if you do mind . . . well, sorry. I don't really know what to tell you.

The two posts I've made so far about my home decor endeavors were about my door decor and my trunk makeover . . . so if you put those two together you get the colors I wanted to use in my main room: red and yellow! Which are a huge, much-needed change from the rainbow of beige tones I used to live in.

My mom (a super cool interior designer and owner of Amenities and Bungalow Boutique, two fun design and handmade craft shops in Heber, UT) gave me this lamp, which she had sort-of-accidentally ordered for her store but really didn't like:

Hmmm. I can definitely understand why she didn't think it worthy of a spot in her stores! I don't know if this photo accurately captures its ugly duckling-ness, but it was a very awkward-looking gray matte color with a clunky lampshade (the same one pictured in the after pictures below). It was just really boring and kind of weird-looking. It was such a sad lamp. If it were a person, it would be grumpy all the time. And gangly and lurpy, with a gigantic head.

She gave it to me (she's so generous, giving me her ugly accidental purchases) with the comment that she thought it could look nice if it got painted.

And yellow was a huge improvement! I just covered the base with newspaper to protect it, and covered up that grouchy gray color with a few coats of a bright sunny yellow spray paint. (and, in case you were wondering, yes, that is the only pillow I have for my couch right now, which is why it keeps working its way into every living room picture that I take. And you know it's time to get moving on sewing pillows for your couch when even your husband says, "Are we really only going to have one pillow on the sofa? Can you please make some more?")

But I wanted the living room to be yellow and red, and so far the only red was on the front door (which doesn't contribute much to an indoor color scheme), as well as some red on the opposite side of the room from what you can see here (it just so happens to be the red project that I mentioned almost killing me last week . . . I'll show you real soon! I conquered it! Take that, you horrible project!), so I thought this half of the room needed a little red, too. Not to mention that the lamp still looked a little bland to me. It was getting less grumpy, but it still seemed slightly depressed.

So I made some felt flowers, modeled after these ones from I Am Momma, Hear Me Roar, and hot glued a little cluster of them onto the shade.

Much better! I think those flowers give the lamp just what it needs to stand out, not to mention pulling in a little of the red from the other side of the room. And doesn't it just look happy now? It makes me smile whenever I see it (and considering the size of our apartment [not very big], I see it an awful lot). A nice happy lamp makeover!

I'll be posting this lamp makeover at some of these link-ups . . . and I'm excited to show you my red project. You know how people always start a project post with, "This was so fast! So easy! Anyone can do it! It'll take you 20 minutes!" I'm not going to lie to you, folks . . . I hated this project. It was not fast. Nor was it easy. It took closer to 20 hours than 20 minutes, and when I say there were blood, sweat, and tears involved, I really do mean all three in a very literal way. But hopefully you'll pat my head and tell me I did a good job anyway so I can start leaning more towards the love end of the love/hate relationship I'm having with this project. Stay tuned.
Related Posts Plugin for WordPress, Blogger...