Tuesday, October 13, 2015
Pacapod Bags -- kinda genius, if you ask me.
But first: let's take a moment to acknowledge that I am A) wearing normal, everyday clothes in these pictures, and B) not in some charming photo location, and C) not made up to look like some supermodel supermom. I'll admit that a bit of insecurity set in while planning this post--I thought to myself, "The nice people who sent me this bag will probably be disappointed when they see this post with a very normal-looking mom in very normal-looking clothes standing against her very normal-looking living room wall. They probably hoped for some Pinterest-sensation wowza photos."
And then, a lightbulb moment. They ostensibly visited this blog before writing to see if I'd like to test out their bag. I assume they peeked around and realized within about 3 seconds of browsing that I am not a Pinterest-sensation wowza supermodel type of blogger. If anything, I actively resist pretending I'm that person, because yuck--who has the time to keep up that kind of charade?
And more than almost anything else in a mother's life, a diaper bag is, above all, utilitarian. And I think that is represented here today. I didn't fuss up for the sake of photos, or try to put on some show for you (or for Pinterest) here. This is real, everyday life--at home, in my living room, using a useful product in a very practical, useful way. And that's about as good as it gets for me :-)
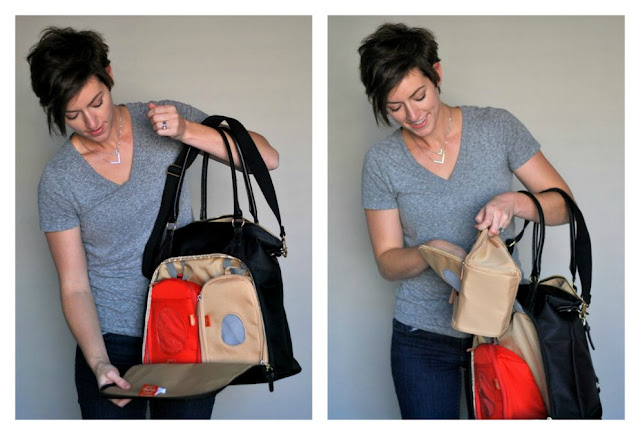
So, let's break it down. What you see before you here is the Pacapod Cromwell bag. I love its sleek look and outer buckles. The gold hardware is a nice, trendy touch, and the fabric would be incredibly easy to wipe down and clean. It's so spacious inside, and that slim outer pocket is a handy touch. I love that it doesn't look like a typical diaper bag--I'm not sure I'd have guessed it was a baby bag if I saw it out in the wild.
What really sets Pacapod bags apart, though, is that it has a 3-in-1 organization system. You have, of course, the typical large diaper bag, but . . .
. . . it also has a completely separate section on the outside of the bag that zippers open to reveal a changer pod (complete with a changing pad and inner compartments to store diapers, wipes, and rash cream), and a feeder pod (which is insulated to keep milk and snacks cold and hygienic). These separate pods fit perfectly into their zipper section, and can be removed and handed off to whoever else wants to take their turn with a feeding or a diaper change (might as well be optimistic, right?).
I love how easy it is to keep things organized here--no loose diapers floating around in the inner part of the bag, no mad search to hunt down a bottle cap or the tube of rash cream. It's all tucked away exactly where it belongs, and easy to find and utilize when you need it.
The bag also comes with a longer strap so you can wear it crossbody, as well as shorter, removable straps to hang it from a stroller.
My only complaint about the bag is that I wish it had more interior organization in the main portion of the bag--it's a large space and easy to 'lose' items inside of. Although I imagine that could very easily be remedied with a bag organizer, the likes of which you can find for all of $5 or so online, which makes this a relatively minor complaint. Just something to be aware of, if you're shopping around and comparing bags.
The pod system is totally genius, especially if you are bottle-feeding a baby. My kids are old enough that the feeder pod isn't an absolute necessity for me, but I think it would have been a life saver when Darcy was little. Such a clever design.
Visit Pacapod to see more of their bag designs, and check out this video if you'd like to see the bag in action.
Monday, January 28, 2013
Crochet Heart Headband for Valentine’s Day
Last week I shared a step-by-step photo tutorial to make sweet little itty bitty crochet hearts for Valentine’s day. I think there are so many fun ways to use these (and I’ll share some more ideas at the end of this post), but today I thought I’d show you just one way I came up with to incorporate these hearts into a fun Valentine’s project—a colorful heart headband:
(Behold my baby sister, Bekah. Lovely, isn’t she? I’m so glad she doesn’t mind modeling for me, because it’s so fun to do her hair and dress her up and take her picture. Like a life-sized Barbie, I tell you. Worry not, she is always repaid for her modeling efforts with baked goods and free crochet goodies.)
Won’t this be a fun little headband to wear around Valentine’s Day? And since those little hearts are so quick to make, you could try them out in different non-Valentinesy colors to wear anytime. This is yet another tutorial that is probably unnecessary (not too tough to figure out how I made this one), but I’m so in the habit now of taking pictures while I make things that it almost seems like a waste to not post a how-to. A blogger’s curse. So . . . want to make one? I have photos for you. Of course I do.
Start by making three hearts using my crochet heart tutorial HERE. I stayed in the pink family, and the size variations are due to using different hook sizes. They were all made with the same pattern. You’ll also need an elastic headband (I believe mine are from Walmart or Target—you can find them just about anywhere!), a hot glue gun, and some felt in a coordinating color (or just neutral colored, like white or beige).
I played around with heart placement and decided I liked the look best with the hearts overlapping slightly, going from largest to smallest (so the smallest heart is near the top of your head, and the largest is near your ear). I think they also look cute clustered, as shown in the picture above, but decided to go with the ducks in a row look for my headband. When you’re sure you like their placement, use a small amount of hot glue to stick ‘em together. Make sure you’re placing the hot glue far enough from the edges so it won’t show or smoosh out the sides of the hearts. Smooshy hot glue is not so pretty.
Then place your glued-together hearts onto the felt and use a pen to lightly trace around them. Cut the felt inside the traced line and place your hearts on top to make sure you can’t see the felt from above—if you need to, go back and trim more so the felt won’t be visible from the outside.
Lay the elastic headband over the felt backing and attach them with hot glue.
Then use more hot glue to attach the hearts on top of the felt. Make sure they’re lined up correctly so you can’t see the felt.
So you should have a headband sandwich here . . . felt backing, then elastic headband, then hearts, like so:
Once your hot glue is dry, you can sport your new Valentine’s Day headband.
I think it’s adorable! If you make one, I’d love to see a picture. And if you like the look but aren’t quite ready to crochet one yourself, I put up a listing in my etsy shop to make one for you. Happy Love Day to us all.
Tuesday, December 11, 2012
DIY Removable Lampshade Accessory
As promised, here is my little secret for making removable décor for your lampshade. What has my life come to, that the most exciting thing I’ve done recently is come up with a way to add and remove accessories to/from my lampshades? Don’t answer. I’ll just ponder that one alone for a few minutes, maybe over a bowl of ice cream. This feels petty. But it’s pretty. Pretty makes petty a little better, right?
On Friday, I shared my Christmas vignette. Here is the vignette sans-lampshade spice.
The lampshade matches the burlap runner too closely, and it looks sorta blah when everything else has layers and pattern and texture and glitz and all. I thought it needed a little of the Christmas-y red to tie it in to the rest of the vignette. I wanted to add some felt flowers, but couldn’t think up a way to attach them that wouldn’t ruin the lampshade if I wanted to remove them after Christmas—hot glue would be a disaster when I want to take the flowers off, and even something less permanent like pins or heavy duty tape might damage the fabric shade. Then, inspiration. And a purposeful lack of google/Pinterest searching, because I’d like to just claim this idea for once without having google/Pinterest prove yet again that I never have any original thoughts.
The answer: magnets.
I made two little flowers out of felt (tutorials abound on the interwebs for felt flowers, so I won’t contribute a new one here) and gathered up 4 magnets that have been sitting in my craft room for ages. They aren’t anything special or super powerful—just part of a big package of cheap magnets I got from the craft section at Walmart months and months ago.
Just cut a small felt circle to fit the back of your flower, and hot glue it on.
Then glue one of the magnets onto that circle.
And shazam! You’ve got yourself some easily-removable, regret-free, no-lampshades-were-harmed-in-the-making-of-this-Christmas-vignette lampshade spice. When you want to get rid of them or switch them our for something different, they’ll come right off with no damage whatsoever to your shade, and you can make them in various colors to fit your ever-changing décor or different seasons/holidays. Just use one of the magnets inside the lampshade, and place the flower on the outside. They’ll hold together and should stay in place just fine.
Don’t you think they add a little something to the look? I think they make the lamp look like it belongs in that vignette, and not like it’s just an extra piece just floating around in there. Sitting awkwardly outside the group, trying to join the conversation. Middle school flashbacks, anyone?
Wednesday, April 25, 2012
Shop Sale!
The Queen Bee Market has come and gone, I’m slowly catching up on the housework that I willfully neglected for the past few weeks while I sat crocheting instead, I’m admiring my own purchases . . . but I’ve got some leftover stock on my hands that didn’t sell at the Market! (I can almost hear what you’re thinking: those nutjobs at Snap Conference didn’t wipe my booth clean?! I know, I know. I’m thinking the same thing.)
But their loss is your gain . . . all my items that didn’t sell at the Market have been marked down and placed in my Etsy shop for you to snatch up! Yay! They’ve already been discounted (up to 30% off regular prices!) so you don’t have to worry about applying a coupon code to get the savings . . . the markdown has already been taken off the listing price. Hurry and check it out—I just added the sale items and they’re already flying off the proverbial shelves. All of the sale items are listed in the “Baby Ready to Ship” and “Women Ready to Ship” shop sections (the sections are located on the upper left hand side of the shop), so you can find your clearance goodies there! Here are some of the treasures you’ll find:

I made a mountain of these button beanies with interchangeable flowers in sizes all the way from teensy newborn to child and have a pretty good variety of sizes and colors remaining. Each hat comes with 3 flowers (pick your own colors!) so you can easily change up the look. I love ‘em! Marked down from $26 to $20.
(And because you have to see how cute they look on a little bebe:)
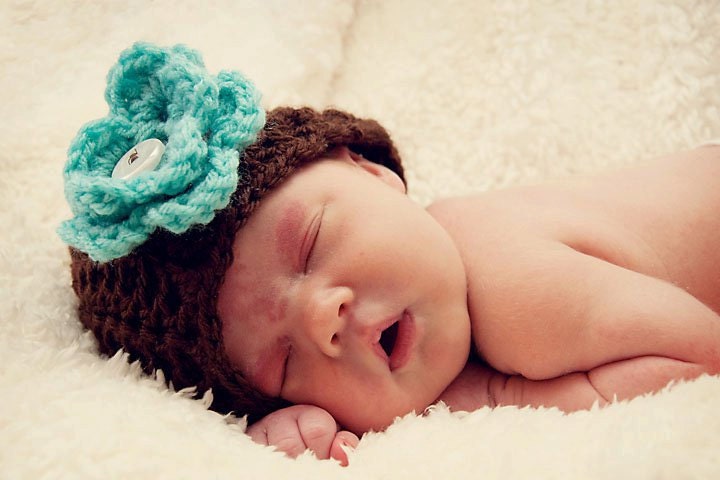
(Awwwwwww!)

I’ve also got a handful of these little elf hats (from newborn through toddler sizes):
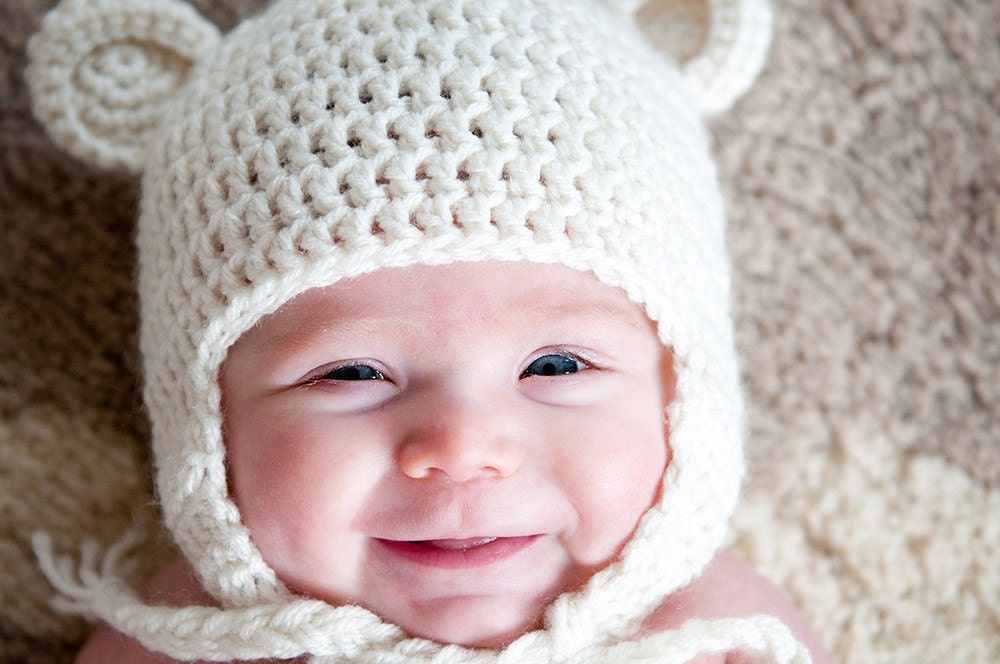
And just a few bear hats:
I love these little headbands—a total steal at $8 each—in sizes from newborn through toddler and a whole rainbow of colors:
And of course, these headwraps are always a popular item—I love that they’re cool enough to wear in warm weather, but they’ll definitely still be useful in the fall and winter. Marked down to just $14:
Whew! I think there are a few stragglers I’m leaving out, but hopefully that’s enough motivation for you to head on over and shop your lil’ heart out. When they’re gone, they’re gone, and jumping back up to my normal prices, so if you’ve got your heart set on something, it would be wise not to wait too long.
(All of these items are available as custom orders as well—you pick the size and colors—but the discounted items are all ready-made and ready to ship out!)
Tuesday, February 14, 2012
3 Step, $3 Infinity Scarf
First things first: Thank you so much for sharing your thoughts (and your gratuitous, giggle-inducing compliments) on my blogging identity crisis post. I really felt a little confused about why I’m blogging in the first place and what (if anything) I should be focusing on, and you guys gave me a great reminder of what I’m doing here: sharing my passions, my thoughts, my hobbies, and my everyday, real, unglamourized (not a real word) life so we can connect and laugh and be inspired and improve ourselves together. The consensus of thought in the comments seems to be that while we all enjoy a good crochet/craft post, most of you seem to just enjoy having a good ol’ internet buddy that you can chuckle and commiserate and create with. And I love being that buddy. So I hereby resolve to never again waste time worrying about what I should be writing, or meeting anyone’s expectations, or keeping up with Susie Blogger over there with her daily inspirational words of wisdom and groundbreaking tutorials and 50,000 diehard fans. If I feel like crafting, craft post. If I feel like whining, whiny post. If I feel like showing off pictures of my gorgeous offspring, you bet you’re gonna see some gorgeous offspring. We’re just going to let it all hang out over here, for better or for worse. Here’s to real, honest blogging! (Yaaaaaay!)
Second things second: Newlyweds on a Budget is giving away 3 patterns of your choice from my shop right now . . . head on over and enter to win!
Third things third: Have you noticed the animal print trend happening lately? I follow a few style blogs and have really been loving the dose of animal prints in some recent outfits . . . whether it’s a big, look-at-me splash of leopard like in this adorable outfit from The Pretty Life Anonymous, or just a teensy touch tossed in, like the shoes paired with this look from Merrick’s Art, I’ve been enjoying the spunk and sass and flair that a little animal adds to an outfit. It seems to instantly perk up an outfit and give it more personality, which is always a good thing.
So I’ve had my eye out for cheap, cute animal prints lately and have been a little disappointed at my meager findings. I truly can’t overemphasize what a cheapskate I am—I decided against a $14 leopard print scarf the other day because I thought that was too much to spend for a scarf. I’ll always have meager findings as long as $14 for a scarf feels like a rip-off. A part of me knows that this is not an unreasonable price, but a louder, more obnoxious, penny-pinching part of me b****-slaps that part into silence. But at Joann’s the other day, I spotted a cute, lightweight, gauzy zebra print fabric in the red tag clearance fabrics—score! At $7 a yard, it didn’t seem like a fantastic bargain, but I figured I wouldn’t need much to make an animal print scarf for myself . . . I only bought 15 inches of it (which was plenty of fabric for a double-loop cowl/infinity scarf, and rang up to less than $3).
1) Many just did not make sense to me. I’ll admit, I can be a bit of a dummy when it comes to following instructions, so maybe my pattern-following issues are just my own problem that needs fixing. But I read through quite a few infinity scarf tutorials and ended up scratching my head, going, “How does this work? Fold what? Sew where? Hand stitch? No sir.” We’re going for simplicity here.
2) They looked too labor-intensive. Honestly, I spent less than $3 on fabric; I’m not going to spend an hour sewing pieces by hand and hiding every seam and finishing every raw edge and perfectly ironing each fold. Sim.plic.it.y. I didn’t turn on the iron, and I was even moaning about having to get out the pins. I considered not swapping out the hot pink thread from my machine. Keepin’ it simple.
So this is my imperfect, one-seam-visible, 3-step infinity scarf tutorial. It seriously took like 15 minutes to make . . . I spent more time editing the pictures than sewing the stupid scarf. If you want a perfect, store-bought, professional-looking piece, I would encourage you to follow someone else’s instructions, because my version does end up with one seam line visible from the outside. I am 100% fine with this, especially since I’m keeping it myself. For 3 steps, $3, and 15 minutes, I will gladly live with a visible line of stitches. Here’s what I did to make my scarf:
Step 1: Fold fabric in half lengthwise (a hot dog fold . . . is that how your teachers taught you in elementary school?), pin along the long edge, and sew. If applicable, make sure you sew the right sides of the fabric together . . . I couldn’t tell if my fabric had a right or wrong side, so I didn’t worry about it.

Step 3: Making sure your fabric tube is flat and not twisted (unless you want your scarf to have a twist, that might look neat!), bring the other raw open end of the tube up and tuck it inside of the folded end from the previous step. Pin the layers together, making sure you’re catching both folded layers and the inner tucked layers, and sew ‘er shut (this is your one visible stitch line).


But I also feel significantly more stylish than I really am wearing it long and belted over a simple sweater:

Thursday, January 26, 2012
My Sidewalk Shawl
 Feast your eyes upon the Sidewalk Shawl, possibly the most beautiful pattern I’ve ever seen. I spotted the pattern (which is free, by the way!) a few weeks ago and drooled over the gorgeous picture for a few days before giving in and hooking it up. I was a tad hesitant to make this—it looked quite a bit more complicated than anything I’ve made before, and I didn’t want to screw it up. But I can only resist the crochet temptation for so long. And I’m glad I gave in because IT. IS. GLORIOUS.
 Look at that beautiful piece! I’m not going to even pretend to be all humble and no-big-deal about this shawl . . . I just stare at it every day, and stroke it lovingly, and tell it how pretty it is. Kind of like I do with Forrest, only a little more tender.
 Part of me feels stylish when I wear it (after all, the girl modeling it in the pattern picture looks pretty chic, which is why I didn’t dare stray from the colors in the picture), and part of me wonders if shawls are fashionable. Or have ever been fashionable. The only time I ever see them worn is in old Western movies, by farmhouse wives while they churn butter or help birth calves. But when my fashion icon, Kate Middleton, was snapped wearing a shawl at a grocery store, I was sold. If it’s good enough for Kate, it’s good enough for me. Now if only I can get up the courage to wear the adorable little British hats and fascinators.
 Some thoughts on the pattern: this is certainly the prettiest, most intricate thing I’ve ever crocheted. But that comes at a price . . . it was also definitely the most complicated pattern I’ve ever followed. It wasn’t exactly hard, but it did require a lot of attention and counting. Usually, I watch a movie while I crochet, or listen to a book on tape . . . definitely not an option for this pattern. I had to sit in complete silence, by myself, with zero distractions so I could focus on the pattern completely. And you know how, with most patterns, you’ve got it memorized after a few rows and only refer to the pattern to make sure you’re still on track? Or you can at least recognize the repeats in the pattern and predict what’s coming next? I never really felt like I could guess where this one was going—only in the last one or two pattern repeats did I start thinking, “Oh, right! This makes sense! I remember doing this before!” Up until the very end of the project, every row felt like a surprise (hence the need for total silence while I worked on it). Again, it wasn’t exactly a difficult pattern . . . it just required more focus and attention than most of the patterns I’ve used. And I’m thrilled with the result—I seriously keep looking at it and thinking, “I can’t believe I made something so beautiful!” Just like with Forrest . . . this is my shawl baby. Oh, how I love my sweet shawl baby.
(I used about 3 or 4 skeins of Caron Simply Soft in in Grey Heather to make my Sidewalk Shawl.)
(Also, I’ve been playing along with Freckles In April’s outfit challenge this week, and I’ll be linking this post up to her blog!)
Tuesday, January 3, 2012
Crochet Raccoon Scarf (for him)
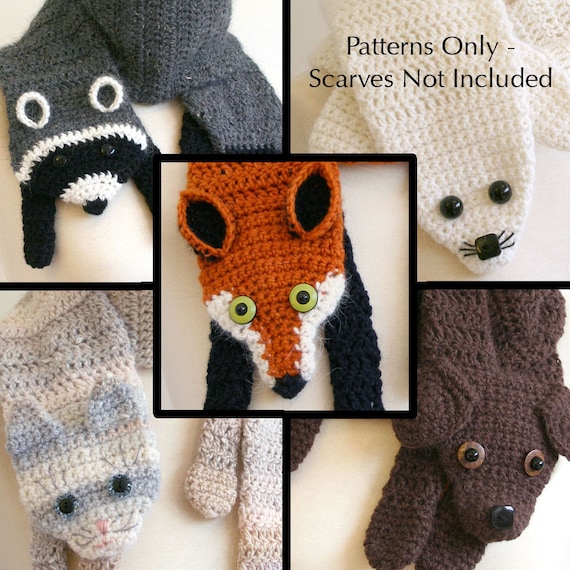
I still have a few handmade Christmas gifts (both given and received) to show you, and I’m particularly excited about this one. It was one of Jeff’s presents that I was most excited to make and show him, and that I fought hard to get him to open early. (I failed. I spend most of the month of December trying to convince Jeff that we should open all our presents right now, but it never works.) You might recognize Bees Knees Knitting as one of the sponsors of our crochet along this past fall—Jenny creates amazingly creative and adorable crochet animal scarf patterns, like these:
Jeff and I loved them, and he especially got a kick out of the raccoon scarf (top left in the picture above). I had my doubts about if he’d actually wear it, but hey, what is Christmas about if not giving gifts to loved ones that they can’t return and might never use?
Awwwww! How sweet is that little fella? He was really fun to make, and I was able to make him entirely out of yarn I already had, so it was practically free to make (minus the cost of the pattern, of course). Speaking of the pattern, I give it two thumbs up—easy to understand, clear instructions with a helpful diagram to show placement and sewing instructions for the ears and legs. I made a few minor changes to accommodate my own laziness (like working in a continuous spiral instead of individual circular rows), and it came out swimmingly.


