Tuesday, March 21, 2017
Darcy's Big Girl Flower Garden Bedroom
I originally intended for this bedroom makeover to be a Christmas surprise for Darcy (although I never got as far as figuring out how to keep an entire room in our house a secret from her), and it is just now completed in mid-March, so that's right on track for my typical scheduling!
I recruited some design talent to put this room together -- namely, Kathleen of Lindsay Hill Interiors (aka Darcy's grandma) and she did a marvelous job of creating the perfect space for Darcy. We wanted to give her a room that was sweet and girly, without being babyish or too 'cutesy.' The results are a lovely, feminine space that can grow with her, and won't feel like a baby room as she gets older.
Needless to say, Darcy LOVES her new room.
Step 1 was getting this girl a Beddy's of her very own. Every member of this family now sleeps in a Beddy's bedding set and they are THE BEST EVER. Perfect trifecta of being simple to use, comfy to sleep in, and absolutely adorable. We picked out the Vintage Blush Beddy's for Darcy's room.
If you aren't familiar with this awesome product, it is an all-in-one bedding set (meaning, literally ONE PIECE of bedding from fitted sheet through top quilt) that zips up the sides similar to a sleeping bag. It is a one step, one zip process to make the bed in the morning, and Darcy can do it by herself. Hallelujah for one less chore for me to complete every day! Another perk for young kids transitioning out of a crib is that zipping it up to her armpits at night prevents her from falling out of the bed as she gets used to sleeping in a bed without side rails. Just awesome, all around.
If you'd like to see how we all use our Beddy's, you can see them at home in Forrest's bedroom HERE, and our bedroom HERE (those pictures are actually from our old house -- maybe someday I'll get around to photographing our bedrooms in our current place!).
Kathleen recommended a feminine accent wall, and she found this beautiful floral wallpaper from Milton & King. I found the idea of wallpaper pretty intimidating, but it turns out, wallpaper is pretty simple to hang (as long as you've got two sets of hands at your disposal, and bonus points if your designer has worked with wallpaper before and doesn't mind helping out!). It took us an afternoon to put the wallpaper up, and I love that it brings in some fun color and pattern without being overwhelming or too 'trendy' -- I have high hopes that this is a style that will look great for years to come.
This dresser was a vintage find that we refinished in a cheery yellow color before Darcy was born (you can see it in her original baby nursery HERE), and it looks perfect in this colorful, happy room.
This girl LOVES her stuffed animals and plays with them frequently, so we included a big basket in her bedroom for her furry friends to live in. And this shaggy, plush, comfy rug from Rugs USA is so soft and cozy that I keep catching Darcy lying on it, trying to make snow angels.
Darcy is absolutely loving her new room, and so am I! If you have questions about any of the items in her room, let me know and I'll do my best to answer :-)
Product list:
Zipper bedding, bedskirt, pillows: c/o Beddy's
Bed: Walmart
Basket, dresser, floral paintings, and many accessories: thrift store finds
Distressed letter "d" over bed: Hobby Lobby
Nightstand: thrifted, I believe originally from Ikea?
Lamp: Target
Wallpaper: c/o Milton & King
Rug: c/o Rugs USA
Friday, December 4, 2015
New King Bed + Beddy's Bedding
I loved the style of our old bed (which you can see HERE if you'd like). It had that cottage-y farmhouse look that I love. I actually considered buying the exact same style in a king, but Jeff convinced me to branch out and try something new. I was genuinely sad, though, that a king bed would mean that I could no longer use the queen size bedspread that I crocheted. I'm saving it in case we ever end up with a guest bedroom.
But no regrets at all in switching to a new mattress size. Sleeping on a king bed has been glorious. Absolutely GLORIOUS. And I'm loving the new look in our room.
I still have a few things to check off the list--namely finding something to go over the bed, and hanging up the mirror that is currently just propped on the dresser--but we've all been so sick for the past few weeks that I'm considering even this much work a major accomplishment.
I'll put a source list for everything down at the bottom of this post in case you also want to do a little shopping. I was really excited to find this beautiful tufted headboard for such a good price (just over $200). When I ordered it, there were no reviews online and nowhere to see it in person before buying, so I was a bit nervous. But it is wonderful in person and I've been really happy with it.
I also painted our nightstands (which I've never been crazy about and still hope to replace before too long), and they definitely fit the room better now. Doesn't everything look better painted white?
By far--and I mean BYYYY FAAAAAR--the best, most comfortable, most convenient, and overall happiest part of this little makeover is the bedding. The wonderful, wonderful bedding.
You may remember that I worked with Beddy's a few months ago to set Forrest up with a big boy bed and bedding--you can see that post HERE. And I raved and raved about how awesome his zipper bedding was, and I was jealous that it was so quick and simple for him to make his bed while I wasted my time adjusting covers and straightening bedspreads and smoothing multiple layers.
(By the way, 6 months later, he still totally rocks at making his bed all by himself, and I can't overemphasize how nice it is to have that one little chore off my to-do list each day!)
My jealousy of his bedding just grew and grew, until finally I begged Beddy's to help me out with bedding for my new bed. And guys, it might have been the best decision of my life so far.
I want to let you in on a little secret here. If you see a blogger work with a company once, cool. It's probably a company that blogger likes and is happy to promote. But if you see a blogger work with a company multiple times, it means they are crazy head over heels and can't shut up about how awesome that company/product is, and if you happen to know the blogger in real life, you will definitely be hearing about it in every conversation you have. This is definitely the latter situation.
This bedding is miraculous. See for yourself. Not only is it crazy cute with the ruffles and smooth panels (and I love how the ruffles mean it never needs adjusting throughout the day, unlike a certain crochet bedspread that needed constant tweaking if anyone even touched it, let alone sit down on the bed), but it is unbelievably comfortable to boot. The bottom sheet is an incredibly smooth and comfortable cotton, and the top layer is lined with minky fabric. I basically just want to sleep naked all the time for maximum minky-to-skin contact. I've resisted, you know, but the struggle is real.
A panel pulls out on each side so you're never chilly or exposed in the night. And in the morning, you just tuck the panels inside and zip the whole thing up. That's it. All the bedding is connected, from the bottom sheet to the top minky quilt, so it always looks perfectly tight and tucked, and you just zip up the sides to make your bed in the morning. And a cute pleated ruffle hides the zipper, too. THEY'VE THOUGHT OF EVERYTHING. EVERYTHING!
They also sent a matching ruffle bed skirt, which is super cool because the ruffle fabric continues up a few extra inches onto the inner material. This means that even if something shifts--if the mattress moves a bit, or if the bed skirt should happen to get tugged down a little--only that pretty ruffle fabric is ever visible. I've always been so bugged when a bed skirt's unattractive inner material shows, so I think this is basically genius.
I'm not exaggerating when I tell you that I have never in our 9 years of marriage seen Jeff make a bed. Ever. I have always made our bed, and when he has occasionally helped it has been more trouble than it's worth because he has zero attention to cosmetic details like smooth sheets or tucked sides, and it would drive me nuts.
But he has made this bed multiple times (because pulling a zipper is fun, right?), and it always looks perfect. Is this real life?
Make sure to check out Beddy's for their amazing zipper bedding that, it turns out, is absolute perfection for little kids and big kids. I love them so much I could cry.
Source list:
Headboard: Walmart $209
Bedding: Beddy's Chic White
White pillows: came with the bedding
Light blue pillows: Ikea
Dark blue pillows and bolster pillow: I made them; fabric from Hobby Lobby
Lamps: Ikea
Lampshades: Walmart
Nightstands: old hand-me-downs from my parents
Throw pillow at foot of bed: made by me; find the pattern HERE
A huge and genuine thank you to Beddy's for providing me with the bedding for this post. All opinions are my own and I received no other compensation besides the product.
Friday, November 6, 2015
Sweet Dreaming with The Dream Bed
We've known we ought to get a new mattress for years and years. Between two little kids who love waking up early and keeping me busy all day long, and running our own business, sleep is a huge priority. (And imagine the embarrassment when Jeff--a chiropractor for pete's sake!--is asked by patients suffering from back pain what mattress he sleeps on and would recommend, and he has to admit he is sleeping on his in-laws' 30-year old hand-me-down mattress.) But we've put it off for years, to the detriment of our comfort and our sleep. This is the perfect opportunity to sleep happy and feel great that we are contributing to something special.
Now, before I get into the specifics of this mattress and what we think of it, I want to tell you a bit about the behind-the-scenes of The Dream Bed. Because it is giving me all sorts of warm fuzzies.
There is a lot of heart behind this company. Every Dream Bed purchase is good for you, of course, because you'll be enjoying comfortable, wonderful sleep. But that isn't all--with every purchase, a bed is also given to a child or family in need.
In my cushy, privileged life, it is hard to even imagine a child not having a bed to sleep in. This is the reality I was blessed to be raised in: of course you have a bed to climb into at night, even if it's a 25-year old hand-me-down mattress. It breaks my heart, as a mother of young children, to imagine little ones not having a bed. But this is the real world, and not everyone is so lucky. I love that Dream Bed is taking steps to make the world a better place and provide a good night's sleep to those who badly need it. In its 2 months in action, Dream Bed has already given over 100 beds to those in need. I love that!

And at this point you're thinking, okay, that's a lovely premise, but I still want to make sure I'm sleeping on a comfortable mattress. Right?
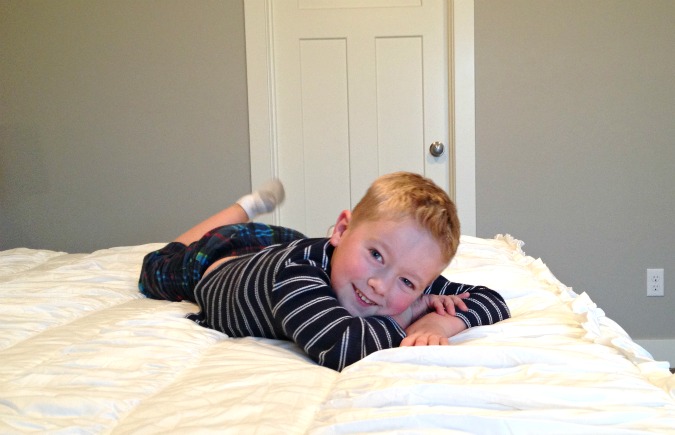
Worry not. I am being 110% absolutely serious when I tell you that I have never slept on a more comfortable mattress in my life. And we're coming off a 30-ish year old mattress before experiencing this one so the difference is basically like being reborn. Even the kids are spending an absurd amount of time on my bed. They're asking to watch movies and read books there instead of heading downstairs to the couch. Fine by me, as long as they don't expect to be sleeping in there with us. (Co-sleepers, you do you. I just cannot. Nope.)
And you're going to have to bear with me for these next 2 photos. I couldn't try to set it up alone and take pictures as I went, so I waited until Jeff was home to help . . . but I kid you not, he is never home when there is daylight. I suspect he is a vampire. So there was no natural light helping out with these pictures here, which were taken at 10 PM. Yikes.
The bed arrived in this box. For scale, I stood next to it for a picture . . . so you can imagine that I was a little skeptical that there was somehow an entire mattress hidden inside. What is this, Mary Poppins' magical bottomless handbag? We pulled the contents of the box out to reveal the photo on the right there. I seriously suspect there was some wizardry involved in making that fit. Neat though, right? That somehow this entire amazing mattress fits inside this one little box that shows up at your doorstep?
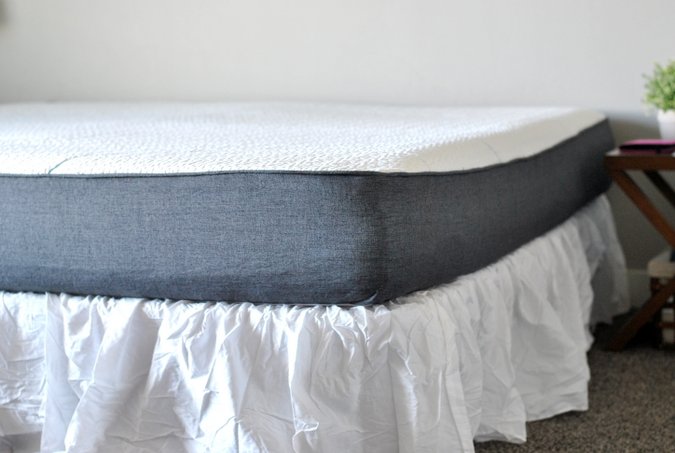
But after removing the plastic, the mattress immediately starts taking shape, and within an hour it was fluffy and full and luxurious.
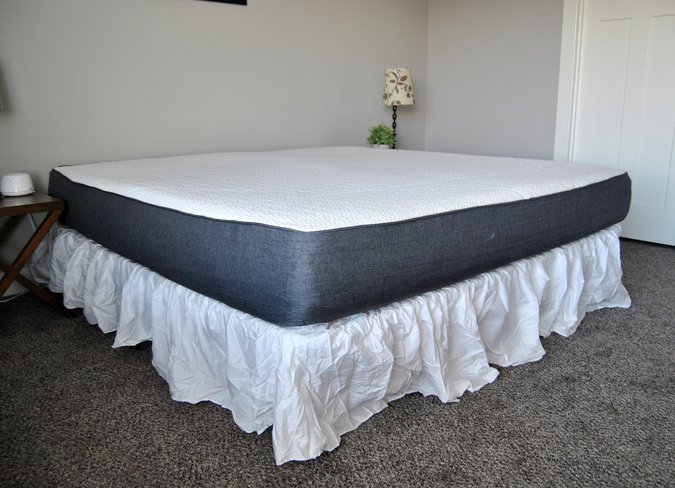
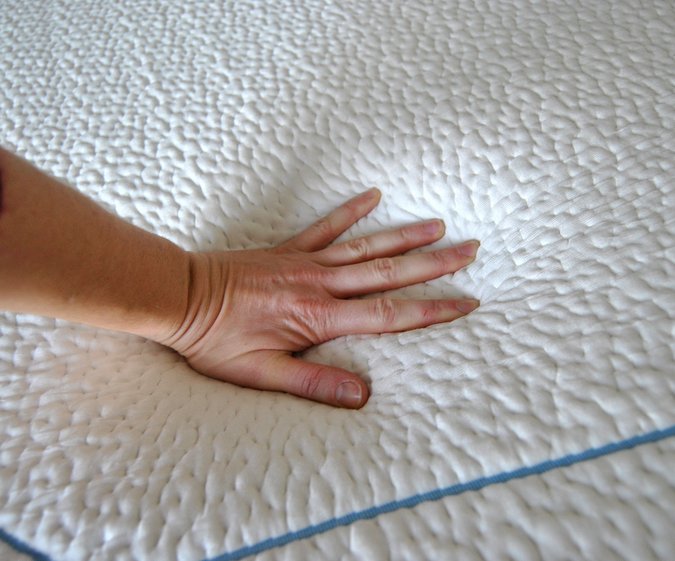
It has a memory foam and latex interior, so it is incredibly comfortable and squishy and delightful. I want to sleep on it forever and ever and never get up. The Dream Bed is available in Original or Cool--we chose the Cool Dream Bed, which has a gel-infused memory foam that wicks moisture and dissipates body heat, because a certain someone who shares my bed has the internal temperature of the average volcano. It has been fantastically comfy.
Awesome bed and a great cause. I'm sleeping happy. If you're noticing that our bedroom looks extremely bare in these pictures, that's because I used the new mattress as a jumping-off point to change things up a tad, so expect a post next week with a bedroom makeover!
Make sure to join us for a Dream Bed twitter party on Mon. November 9th to learn more about The Dream Bed!
This is a sponsored post written by me on behalf of The Dream Bed™.
Thursday, June 25, 2015
Townhouse Tour: Nautical Big Boy Bedroom
His itty bitty 3 drawer dresser has been bursting at the seams for years now, so maybe we ought to get a bigger dresser for him . . . and if we're going to be getting a bigger dresser, maybe I'd better get him a matching nightstand, too . . . and if he's going to have a full-sized dresser and nightstand, I suppose he ought to move up into a twin bed since his little toddler bed might look silly next to all that big furniture . . .
All of a sudden, we had an entire bedroom transformation on our hands. These projects always start out innocently, don't they? Classic 'if you give a mouse a cookie' situation.
I wanted it to be a room he could grow with--something that's perfectly fun for him now while he's little, but will be just as fitting for a 6- or 10- or 13-year old boy. I love how it came out.
I wondered if he'd have any issues with moving from a little toddler bed to something bigger--he's actually done really great. He loves his new bed and seems to think it's really cool and grown up to sleep in a big bed.
I remembered looking at Beddy's months and months earlier, and revisited their site, where I fell hard for the Game On bedding set. It looked to me like the perfect bedding for a classic boys' room--it has personality and was a great jumping-off point for the rest of a traditional, nautical room design, but it's simple and classic enough to be a great fit for all sorts of bedrooms, so I'd have some freedom to change up the look of the room later on. But more on the bedding in a minute.
First, the dresser that started it all. As I mentioned earlier, Forrest has been using a 3-drawer dresser forever, and while it was a good fit for his baby clothes, it was just too small as he (and his clothes!) grew. So we went all-out with a big 9-drawer dresser, with the hope that I never have to buy him a larger dresser ever again. It's a pretty large piece of furniture, but this room is bigger than his room in our old house, so I think it actually works fine in here. Never could have made this work in his old room.
I feel like Pinterest would want me to accessorize and style the top of the dresser. But real life tells me that this is a 4-year old boy's bedroom, and any styling will last approximately 45 seconds before he sweeps it off to use as a superhero fighting arena. So I didn't even bother. Just for the sake of these pictures, I tossed on a wood slice leftover from my sister's wedding decor, along with a wooden fish my brother brought back for me from Guatemala about 15 years ago, and Forrest's alarm clock that is only like 80% clock, and 20% little kid finger grime.
The woman who painted the dresser also refinished this little nightstand for the room, too. I worried about the style of this one, but I've decided that it's actually really functional. The drawers are fake (bummer), so having an extra shelf provides some of the storage I wish it had in the first place.
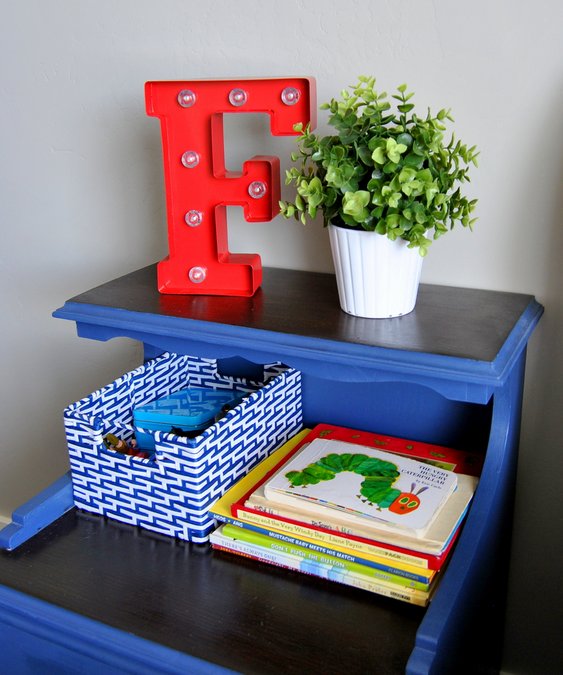
The little basket (toy storage) is from HomeGoods, the plant and planter are from Ikea, and the light-up letter is from Joann. The anchor art above the bed is also from HomeGoods.
I felt like a nautical bedroom wouldn't be complete without a red, white, and blue pennant banner. I made this super simple one in less than an hour (super simple in that I didn't bother making it reversible or finishing the cut edges or anything--it's going to hang, untouched, on a wall, so I don't see the point of making it all fancy). The fabrics are from Joann--1/4 yard each of 5 different prints, plus 2 spools of navy ribbon. I love the playful touch it adds.
One of my biggest annoyances in Forrest's room has always been that he won't (or can't) make his bed by himself. It's not that big of a deal for me to make it for him, really, but it's just another chore to do when I already have so many things to do around the house every day. I've tried teaching him how to make his bed, but even with a small toddler bed, he couldn't reach far enough to pull the blankets up, and he could never pull them straight, and he'd get frustrated and upset about it.
This is awesome--the Beddy's includes all the bedding you need in one piece. The fitted sheet and blanket are connected along the bottom, and the top blanket just needs to be zipped up along the side to make the bed. When you need to wash the bedding, you just pull it all off in one piece and toss it in the washer. And the top blanket? It's lined with minky. What I wouldn't give to sleep under a minky blanket each night.
He just unzips it at night and climbs inside (and a minky panel pulls out so that even when he's under the top blanket, there's some blanket hang-over on the sides so he won't get chilly). How obvious is it that he thought it was awfully silly to pretend to be sleeping for this picture?
And in the morning, he just pulls the blanket straight and zips up the side to make his bed.
I LOVE that he can make his bed completely on his own. He doesn't need my help, he doesn't get frustrated about it like he used to, and it only takes him a few seconds. The quality of the bedding is really wonderful, and the idea itself is genius. No more morning fights over making his bed.
For your viewing pleasure: a GIF of the bed-making in action. I hope this works. I have no idea what I'm doing.
Just an FYI: this post is not sponsored. But I wrote to Beddy's after falling in love with their bedding online and they graciously sent Forrest's bedding in exchange for mentioning them in this post. And I can recommend them 100% . . . awesome customer service, high-quality materials, and it makes our mornings go a little more smoothly.
What do you think of Forrest's bedroom? Do your kids struggle to get their beds made in the morning?
Thursday, June 11, 2015
Townhouse Tour: Master Bedroom
As a reminder, we sold our house last month, and instead of buying a new house, we used all the money from the sale to help pay off our student loan debt. We only moved about 10 minutes away from our old place, into a townhouse that we'll be renting for a year (minimum) while we save up for a down payment for a house.
Without further ado: our new master bedroom.
. . . and we've written that exact message into the guest book of every wedding we've attended since.
In our previous house (that still sounds weird), we painted the master bedroom a soft, celery green (I've wondered if the new owners will keep it or paint over? It was hands down my favorite color in the house, but I have learned that green is a somewhat polarizing paint color). I liked how soft and quiet the colors in that room were, so I kept all the bed linens neutral (creams and tans).
But against these gray walls, the neutral colors of our bedding and pillows looked dead boring. I've had a Hobby Lobby gift card burning a hole in my pocket since Christmas, so I finally spent it on fabric and sewed some new pillows for the bed (I re-used the old pillow forms, and sewed envelope-backed cases for them). I'm not a terribly knowledgeable or talented seamstress, but I can handle pillow cases. I love the bit of color they bring into the room. I'm on the hunt for new lampshades--not loving the pattern or the brown tones on our current ones anymore. No luck yet.
The mirror above the dresser was another hand-me-down from my mom, that I'm not totally sure about in that spot. (Thoughts?) I'm considering painting it a distressed white and hanging it on the wall. For now, it's just leaning there while I decide what to do. The two little birdhouses are from Hobby Lobby (quite a few years old now).
On the opposite side of the room we have the closet, and a rather big empty corner that I'm thinking would make a nice little reading area if I can find a cozy chair for a good price. But I am hesitant to buy anything specifically for this townhouse, since we know we won't be here very long. So this will probably never come to be, but I am clinging to the idea that someday, somewhere, I will have a charming little reading nook!
And that hanging on the wall (I have no idea what to call it) really pleases me. Yet another hand-me-down from my mom, that I haven't ever used until now because I wasn't sure what should go into the little basket area. I finally cut a piece of burlap to fit, and placed 3 fake plants from Ikea inside. I really like it.
So there you have it, the first room of the new place. More to come.
Thursday, June 13, 2013
Quick + Cheap Graphic Canvas Art
I’m traveling outside my box today . . . far outside my box. So far from my warm, comfy box. Hold on to your hats, folks, there is no yarn in this project.
I tried my hand yesterday at making some artwork for Forrest’s bedroom (which you can see HERE). For the most part, I’m pleased with his bedroom and feel like it’s more or less completed (at least, it’s completed enough for my minimalist decorating taste), but there was one obvious area that I’ve kind of ignored . . . the space above his dresser:
I hung that mirror shortly after we moved into our house almost a year ago, but never really decided what else to do with that area. I had originally thought it would be cute to collect a few vintage toys to display on/around the mirror, but I only ever found one old toy that I liked, and Forrest lost it within like 10 minutes of purchase, so that didn’t pan out. But posting that picture above must have been the kick in the pants to finally make that spot look a little more on purpose.
(You are so welcome for the attention to detail I put into my photography and blog posts—the mirror still has the sticker tag on it [I’ve owned it for at least 4 years], and who can remember the last time it was washed? Not this perfectionistic Susie Homemaker.)
Sticker tags and finger smudges aside, that’s much cuter, isn’t it? The little ‘Say Your Prayers’ sign was a 50 cent thrift store purchase quite a few months back that I had never bothered to hang, so it took all of 5 minutes (5 precious minutes procrastinated for 6+ months) to hang it along with Forrest’s cute baby picture. But that left the spot to the left of the mirror empty, and I flipped through my Pinterest inspiration pics and found two cute canvas projects that I thought would look great and (hopefully!) be relatively easy to make: this cute wall art from The Embellished Nest, and this great herringbone canvas art from View Along The Way. I decided to combine the two—I loved the graphic layout of The Embellished Nest’s project, but preferred the painting style from View Along the Way’s art, so I picked my favorite parts of each project and went to work.
It came out far from perfect, but it’s good enough for me. I think it’s a cute little piece, and it was actually kind of fun to put together despite my serious lack of talent in the artwork/painting arena.
Here’s how I made this little canvas art, quick and painless, for under $10:
I bought:
- a 3-pack of 8 x 10” flat canvas panels from Walmart ($3.97 for the pack of 3)
- a few small acrylic paint bottles (57 – 97 cents each)
- package of foam brushes (I think $1 for 4 brushes?)
I used masking tape to lay out the design—two long vertical strips first, followed by smaller zig-zag strips. Measuring would have been smart; I just eyeballed it.
Make sure the edges of your masking tape are pressed down tightly. Since I peeled up and rearranged mine a few times, it probably wasn’t pressed down tightly enough, and I got some leakage underneath the paint. Part of the problem was that I initially tried to go for the ‘drippy’ paint look from View Along the Way’s Herringbone Art, and although I love how it looks on hers, it wasn’t working for me and I think the added water helped the paint work its way under my tape. Whoops!
Start adding your paint, blending each color with the next as you work your way down. I can’t say there’s a lot of technique here . . . I just started with my first color and painted a few horizontal strokes across, then when I was ready to fade into the next color, dipped my brush into the next color without cleaning off the first color so they blended together on the canvas. I tried to add some red at the bottom of the canvas to tie into the sign and photo, and got a swift elementary school art class reminder of what blue + red equals. Had to hide that with more blue; purple is not part of this room’s color scheme.
I peeled off my tape while it was still wet, then waited until it was dry to go back with white paint and clean up some of the taped-off areas that the colors had leached onto under the tape. Once it was completely dry, I used a Command strip to hang it.
And there it is! A quick, simple, fun little painting project to fill that little space. I think it turned out cute, and now I have two extra canvases to play with. Don’t get too excited—very limited art skills over here.