Friday, December 11, 2015
Kids' Holiday Cookie Party
With Christmas coming up, I wanted to do a little something to get the kids excited about the holidays. And I thought a Christmas cookie party would be a great way to generate some holiday excitement.
We headed to my mom's house for our little gathering, since she has it decorated adorably. It basically looks like a gingerbread house right now, so it seemed like the perfect location for a Christmas cookie party. We kept it simple by focusing on red and white decorations. She already had her white tree set up with red ornaments, so we used a white tablecloth and red place settings to keep the theme going.
I set up one end of the table with sweet little gingerbread man cookie plates, and used the other end of the table as a cookie decorating station. I bought OREO, Chips Ahoy!, and Nutter Butter box packs at Walmart for our party, and set them out on a tray along with some decorations like frosting, chocolate candies, and pretzels. These snack-size boxes were perfect for our party (almost no prep to pull this party together!), and they'd also be perfect as stocking stuffers, neighbor gifts, or teacher gifts. I grabbed a few extra to give to Forrest's preschool teacher and our neighbors. Gotta love an easy, affordable gift that makes this season a little simpler.
I set out a few examples of decorated cookies that the kids could copy if they liked, which, of course, the children totally ignored and let their artistic juices flow. Fine by me, as long as they have fun!
Don't laugh at my snowmens' faces. I did my best.
We dipped the Nutter Butter cookies in melted white chocolate to create a snowman body, then used black decorator icing for the eyes and smile and an orange mint for the nose. Broken pretzels make nice antlers for OREO reindeer, along with a red chocolate Rudolph nose. And the Chips Ahoy! cookies are so delicious sandwiched with frosting and rolled in colorful sprinkles.
Poor Darcy was feeling a little under the weather on our party day. She wasn't a very active participant, but perked up after sampling the cookies, and sure looked cute sitting at the head of the table.
After we finished decorating (and snacking), we let the kids bag up their cookies to take home and deliver to their friends, teachers, and neighbors. I love finding ways like this to get them thinking about how to make someone else's day special, even if it's as simple as delivering some cookies.
We're attaching these cute little tags to our cookie bags. Feel free to print them out and use them for your holiday gifting! Just right click on the image below to save it to your computer and print at home.
I'd definitely recommend stocking up on these cookie boxes to give during the Christmas season. They're easy to find in huge bins right by the checkout aisles at Walmart!
What's your favorite Christmas cookie?
Monday, November 9, 2015
3 Ingredient Peanut Butter Bars (with free 'fall' leaf cut file!)
The good news: we have quite a bit of Halloween candy hanging out in our pantry right now.
The bad news: all the good stuff is long gone and we're left only with the varieties no one wants to finish off. I'm looking at you, candy corn. Candy corn an embarrassment to other self-respecting candies. I hated it passionately until a college roommate taught me to mix it with salted peanuts . . . suddenly, it was transformed into something entirely different. I gained a new respect for candy corn that day. It is abominable on its own, but can actually be pretty great mixed with peanuts.
If you have leftover candy corn that you don't know what to do with, here's the solution. Turn those awful little candies into some of the yummiest peanut butter bars you've ever tasted--delicious, rich, quick, and easy. And yes, it's hard to believe, but there really is candy corn hiding in there.
Yep, only 3 ingredients necessary for these yummy bars. You don't even have to turn on your oven, and you'll spend all of 5 minutes getting this ready. (Although, fair warning, you do have to let it cool and harden before you can dig in.)
The best part is, they taste unbelievably similar to some of my favorite chocolate and peanut butter candies. So even though all the best Halloween candy is long gone, its spirit lives on in these bars.
Our 3 ingredient line up for these bars: candy corn (which we'll melt down into a gooey and delectable concoction), chocolate chips for a creamy top layer, and Peter Pan's NEW Simply Ground peanut butter, which I picked up last week at Walmart.
Now, I have a long-running love affair with peanut butter. I descend from a proud family tradition of experimenting with every nut butter we can find, fighting over who would get the last peanut butter candy, occasionally making our own nut butters at home, and eating it all straight from the jar with a spoon. And this new peanut butter? Well, color me impressed.
Because creamy peanut butter? Great. Can't get enough. Crunchy peanut butter? Awesome. But I'm not sure I've ever before had a store bought peanut butter living in that perfect middle ground between creamy and crunchy, with a wonderful freshly-ground texture that isn't too crunchy nor too smooth. And it's absolutely perfect for these bars--I've experimented with both creamy and crunchy when making this recipe in the past, and while they've always turned out yummy, neither has offered quite the texture that I wanted. The Simply Ground gives the bars just enough texture and crunch (and without having to stir it in the jar--I hate doing that). Just take a look at it.
See what I'm saying? Love it.
Anyway. Back to the bars.
You'll microwave a bowl of candy corn, stirring every 30 seconds or so, until it's melted and smooth. Don't overheat it!
Then stir in the peanut butter until smooth. You'll want to work quickly, as the melted candy corn will start to harden back up quickly as it cools.
Spread it into a 9x9" square pan, lined with foil and lightly sprayed with nonstick spray. I find it easiest to lightly spray my hands and just use my fingers to press and spread it into the pan.
Melt the chocolate chips in the microwave, and spread it over the top of the bars.
Pop it in the fridge to cool. When the chocolate has hardened, use the foil to remove the bars from the pan, peel the foil away and toss it out, then cut into pieces.
I had to get some of this goodness out of the house ASAP, so I packaged some up to deliver to neighbors. I love the festive fall orange color of the bars, so I echoed that with an orange fall leaf gift tag, wrapped around each package with twine.
I love how easy it is to package up a cute tasty gift for neighbors. I designed the tag in Silhouette Studio, and cut them out with my Silhouette. If you'd like to make these tags yourself, you can download the cut file for your personal use and enjoyment HERE!
1. Just cut the design with your Silhouette and remove the letters.
2. Place some bars in a bag, and wrap the top shut with twine.
3. Punch a hole in the top of the leaves (I realized too late I could have had the Silhouette cut the hole for me--d'oh!), and thread a leaf onto the twine, then tie off in a knot.
So simple, but so cute!
3 Ingredient Peanut Butter Bars
1 cup candy corn
1 cup peanut butter
1 cup milk chocolate chips
Line a 9x9" square pan with foil, and spray lightly with nonstick spray. Set aside.
In a medium-size microwave-safe bowl, melt candy corn in the microwave, removing to stir every 30 seconds. Don't overheat the candy corn--heat it just until melted. Add peanut butter and stir to combine. If you're having a hard time mixing it in thoroughly, heat the peanut butter and candy corn combo in the microwave for a few more seconds to loosen it up.
Pour candy corn and peanut butter mixture into prepared pan and spread evenly. It's quite thick and sticky, so this could be a bit tricky, but the easiest way to handle it is to spray your hands with nonstick spray and then press it into place.
Melt chocolate chips in the microwave, stirring every 30 seconds until smooth and creamy. Spread evenly over bars. Refrigerate bars about 1 hour or until hardened. Remove from pan, remove foil, and cut into pieces.
And more good news: if you want to try out new Simply Ground peanut butter, you can grab a digital coupon HERE to save some money on your purchase! You can find it at Walmart in the aisle with peanut butter and other condiments.
(Cute little shopping buddy not available for purchase.)
What peanut butter flavor fits your personality? Take this quiz to find out!
Monday, November 24, 2014
Dare to be Thankful: Thanksgiving Tree
Week one of Dare to DIY is here (and the linkup is over at Shift Ctrl Art)! This week’s theme is Dare to be Thankful, and I did the most original, mind-blowingly creative, never-before-done project.
Or maybe you’ve seen thankful trees done a million times before, but hey. Go with it.
Forrest is finally getting old enough to really be excited about holidays. Up until now, I haven’t done a whole ton of holiday kid stuff—when I’ve tried to encourage holiday excitement or start traditions in the past, he mostly waffled between confusion and ambivalence. Hardly worth the effort on my part. But he’s been very interested in holidays lately, and it has been so fun to fuel that excitement. So a week or two ago, we capitalized on his holiday excitement to have a little family lesson on being thankful.
I used my Silhouette Portrait to cut two different leaf shapes in a variety of colors, and gathered a few twigs and sticks from the backyard. I dug these two pots out of my garage, as well as some leftover moss and foam from older projects. So this turned out to be a free project, pieced together with leftover bits of other projects—is there any better kind?
So one evening after dinner recently, we talked to Forrest about what it means to be thankful, and we each took turns naming things we felt thankful for, and writing them on our leaves. I used hot glue to attach each leaf to the tree.
I didn’t change much in this little vignette from my Halloween decorating—I just swapped out the candy corn hurricanes for the thankful trees and called it good. I like how they turned out—those twisted branches are pretty dang cool, if you ask me, and it’s fun to look at the words on our leaves and especially to remind Forrest, if he’s being grouchy or rude, of the things he wrote on his thankful leaves. Forrest was not feeling particularly deep the day we did our thanksgiving tree activity, actually—most of his leaves are devoted to gratefulness for various toys, his blankie earned a whopping 3 leaves, and apparently none of his family members deserve a spot on the tree (although our little neighbor Abigail got a leaf). #offended
Make sure to check out the other cohosts’ projects for some awesome inspiration, and visit Shift Ctrl Art to link up YOUR thankful projects!
Merci Beaucoup vignette at Shift Ctrl Art // Crazy Thankful Sign at Décor and the Dog
Thankful Trees (me) // Thanksgiving Thumbprint Wood Tray at Newly Woodwards
Tuesday, August 19, 2014
Preschool Prep and a No-Sew Personalized School Bag
This shop is part of a social shopper marketing insight campaign with Pollinate Media Group® and Sharpie, but all my opinions are my own. #pmedia #StaplesBTS http://my-disclosur.es/OBsstV
Forrest starts his first year of preschool in T minus 10 business days. Not that anyone’s counting, except that I am totally counting, and might I add: sing praises, all together now, hallelujah it’s almost time for preschool! When I signed him up, I had the option of placing him in a two day per week class or a three day per week class. And at the time, he was right in the middle of a super sweet, very adorable, obedient and well-behaved phase. Which I now believe was a carefully planned, expertly orchestrated ruse to ensure he was not shipped off for the maximum possible number of preschool days each week. Because I swear, the second—the very second—I checked the two day class box in a moment of flowery motherly weakness, thinking that I couldn’t possibly bear to be away from that sweet angel boy for three days each week, his inner demon returned and everything fell to pieces—tantrums, arguing, talking back, sending me to time out, the works. If it were an option, I’d send him to 7-day per week preschool at this point. (And yeah, I totally called to see if I could switch him to the three day class and nope, all the clever parents who knew what they were doing went for that class and it’s full.)
So yes. Yes, I am a bit excited for preschool. I’m not sure Forrest is entirely sure what it is I’m going on about as I try to pump him up for his first year of preschool, but he seems excited anyway. I think (and really, really hope!) he’ll love it—he’s very social and always excited about any sort of interaction—and I’m doing everything I can to make sure he’s looking forward to school. I thought he’d have fun spending a few minutes working on a little craft project together to help get him excited about preschool, so we worked together to make a special bag for him to bring each day. So simple and easy, but really fun for us to make together. And I’m telling myself that strutting through those preschool doors on his first day, carrying a special bag that he helped make and thinks is awesome, will help give him a little extra confidence. A trait he is certainly not lacking, but still. He’s my sweet little stinker, and I guess I’ll build him up however I can.
I briefly entertained the thought of sewing a tote bag myself, but when you get a 50% off craft store coupon in the mail which makes a plain canvas tote bag ring up in the $2-3 range . . . yeah. You change those plans real quick and go the store-bought route. While we were there, we grabbed two sheets of colorful felt, then swung by Staples to pick up some neon Sharpies.
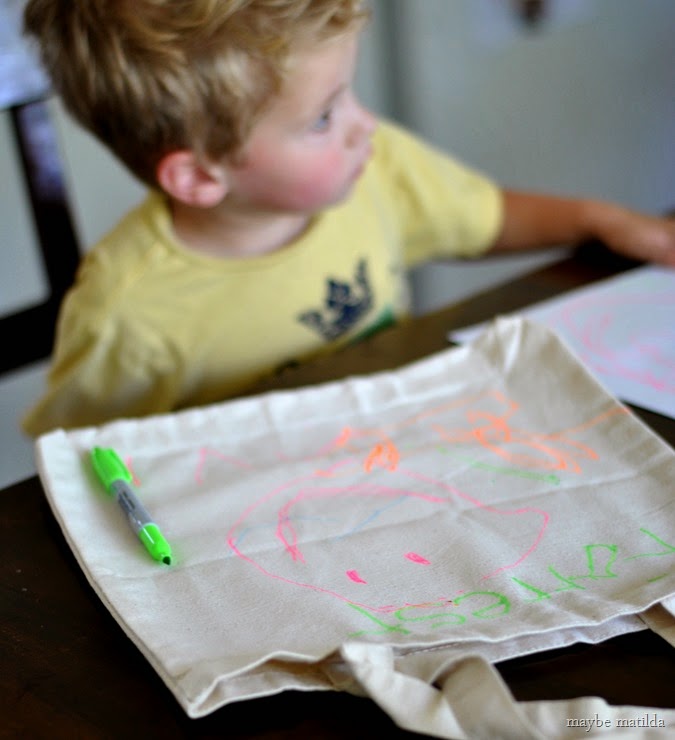
Although it is always surprisingly difficult to let go of the reins and give full creative freedom to someone else (especially a pre-preschooler with limited motor skills and questionable artistic vision), I let Forrest go to town on one side of the tote bag, drawing and scribbling however his little heart desired. His preschool, his confidence at stake, his tote bag, and his artistic passion, unleashed.
He seemed super nervous about drawing on fabric, despite my insistence that it would be okay. I’ve put so much effort into drilling “we ONLY draw on paper!” into his little head, and never did I dream that I would have to convince him otherwise; that he could, in fact, just this once, go wild with Sharpies on a non-paper surface. It took some encouraging to get him to make that first artistic stroke on his canvas. But the artist finally emerged and he did a lovely(ish) job. (Just look at the expression—he absolutely thinks he’s getting away with something here.)
With his art filling one side of the tote bag, I took over for the other half. Each student in his preschool is assigned a color and a shape (what purpose this serves, I have yet to learn—I guess we’ll both be learning some new things this year). Forrest’s color and shape are a yellow star, so I figured they’d make a nice choice to adorn his tote bag. I cut a star as well as an F (for Forrest; hopefully not as foreshadowing of the preschool grades he’ll be receiving) from felt, and hot glued them to his bag. (I considered stitching them on by hand with colorful embroidery thread, but really. My hot glue gun was sitting right there on the counter. I didn’t want to hurt its feelings.)
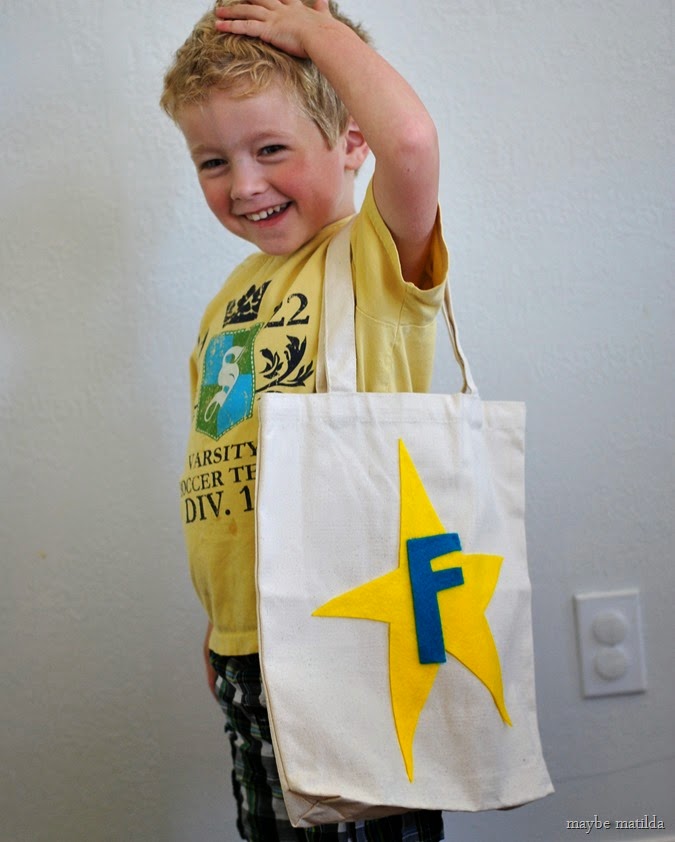
Forrest seems pretty excited about having his own bag to bring to preschool, and especially excited that he got to help make it. Every time we do a craft together, I think, okay, this is more fun than I expected . . . why don’t we do this more often?
Just look at that artistic talent—undoubtedly the work of a prodigy, a budding genius. (Lest you think too highly of my at-home teaching skills, he did not write his name all by himself. He did, however, draw the happy face, and I think it’s pretty charming.)
If you’re in the market for Sharpie products for a back-to-schooler (or not—let’s be honest, any and all back to school shopping I’ve done so far has been almost exclusively for myself . . . oh, how I miss fresh crisp notebook pages and shiny new pens!), perhaps you’d like to know that all Sharpie Fine and Ultra Fine assortment packs and Sharpie Neon Marker packs are on sale at Staples through August 24th, while supplies last.
Happy back to schooling, everyone!
Friday, July 18, 2014
10 Minute No-Sew Barefoot Sandals
I kind of expected that I’d go a little nuts on baby shoes when expecting a girl. Shoes are, of course, the most adorable thing that can be purchased for a baby, and this is an indisputable universal fact. But here we are, almost 9 months into this whole raising-a-daughter thing and Darcy owns 3ish pairs of shoes. Impressive, no? None of these 3 pairs, however, matched her outfit for Bekah’s wedding, and you know how cheap I am, so I figured I’d see if I could DIY something that look cute with her outfit without pinching her fat little feet or costing much.
And my gosh, they turned out darling.
Add barefoot baby sandals to the list of things I thought were ridiculous before having a baby girl, but now think are precious (it’s an ever-growing, embarrassing list).
I already owned the elastic I needed to make these shoes and only needed to buy a little bit of ribbon for the bows, so I’m not sure what the price would be if you were starting from scratch--I’m going to guess in the $2-5 range. Much less expensive than a pair of store bought shoes, totally comfortable for baby, and easy to customize to go along with whatever outfit you’re trying to match. And not turning on the sewing machine is always a plus in my book.
To make these sweet little sandals, you’ll need:
- a small amount of fold-over elastic (I used about 16 inches total). My elastic was leftover from making a batch of baby headbands, and was purchased from Elastic By The Yard on Etsy. I suppose you could use regular elastic for these if that’s what you already own, but fold-over elastic is slim and a bit shiny, so it looks really nice for a project like this, plus it’s smooth and soft, so I bet it’s more comfortable for little feet.
- a small amount of glitter ribbon (or, you know, whatever ribbon you want). I got this gold glitter ribbon at Walmart, and bought 1/2 yard. I still have quite a bit left over.
- hot glue gun
Step 1: Cut a length of ribbon that can wrap comfortably around baby’s ankle and the bottom of her foot. For Darcy (currently almost 9 months), this was about 7-8 inches. Lay it out in a Z shape.
Step 2: Bring the top end of the Z down and hot glue it to the middle of the center piece.
Step 3: Bring the bottom end of the Z up and hot glue it over the top piece. Look, it’s an 8. Nifty.
Step 4: Bow time! Hot glue a small piece of ribbon—about 3-4 inches—in a loop.
Step 5: Cut a 2- or 3-inch length of ribbon in half lengthwise.
Step 6: Pinch the loop into a bow shape and glue a small length of one of these strips around the center. Cut the second strip into 2 pieces and trim the ends into points.
Step 7: Glue these two pointed strips to the bottom of the bow, then hot glue the bow onto the elastic.
Ta-da! Quick and painless. Slip the upper loop around baby’s ankle, and the lower loop right underneath her foot. Baby girl be stylin’ and fancy.
Monday, December 31, 2012
Top 10 Projects of 2012
In a cruel twist of fate, my favorite projects are without fail the least popular posts here on my blog. So instead of sharing my top 10 most viewed posts of the year, I’m sharing the 10 I personally enjoyed making and sharing the most. They might not be the ones that are getting pinned and commented on the most, but they’re the projects I found the most joy in creating and using.
Sidewalk Shawl—possibly my favorite crochet project to date. It was an enjoyable challenge to crochet, it’s fun to wear, and I love the look and feel of it.
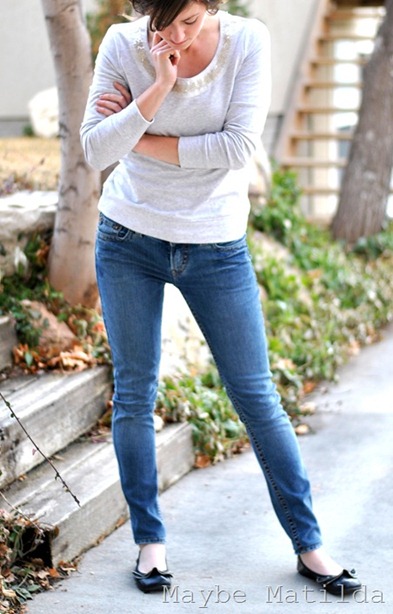
Turning Bootcut Jeans into Skinny Jeans—by no means a complicated project, but one of my most practical this year, since I was able to turn a pair of rarely worn flared wonders into one of my favorite pairs of perfect-fit skinnies.
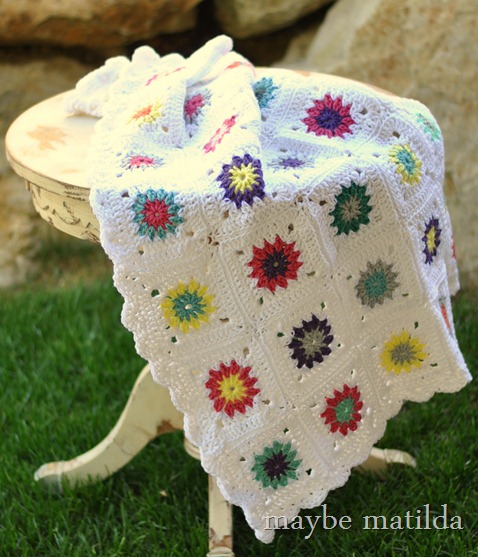
Pink Granny Square Blanket—I spent a long time resisting granny square blankets because they seemed so, well, granny. But this fun pattern made up in bright happy colors has changed my mind about granny squares. Just like grannies, they can be cool.
My DIY kitchen makeover—as a new homeowner who has tackled numerous DIY home projects, I can honestly say I don’t enjoy working on home projects. But the agonizing work was worth it to transform my kitchen.
Winter Ripple Blanket—I don’t seem to be capable of going too long without trying out a new blanket pattern. It’s a weakness I don’t mind indulging. This blanket was one of my first projects of 2012, and I still love looking back at the photos of it.
3-Step Infinity Scarf—sometimes the quick projects really are my favorite ones. This quick and simple infinity scarf is a breeze to whip up. I’ve loved wearing it this year, and always have an eye open for cute clearance fabrics so I can make more.
Queen-Size Lacy Ripple Blanket—you saw this one coming from a mile away, I’m sure. I loved making this blanket, and now I love seeing it in my bedroom every day. I’m very proud of this one!
Turkey Handprint Thanksgiving Shirt—another quick and easy project that was both fun to make and fun in action. Forrest and I actually had a good time making it together (shock and awe), and he looked so adorable on Thanksgiving, wearing his little turkey shirt.
Speaking of quick and easy kiddo projects . . .
30-Minute Baby Lounge Pants—another easy one that is so useful! I used an old t-shirt to make a pair of jammie pants for the little guy, and it was a great way to give new life to an item that otherwise would have ended up in the trash while stocking the pj supply for this fellow. I actually have a stack of shirts in my craft room right now that I need to turn into comfy pants, because a certain 2-year old in my house has developed an inexplicable hatred for his footie pajamas and refuses to wear them. New PJ pants on the way.
Crochet Camera Strap Cover—I came up with this easy pattern on a whim one boring afternoon, and I’ve been so happy with it! A simple, cute way to perk up a plain camera strap, and it’s incredibly comfortable to wear around with your camera. Win.
Happy New Year, folks!